Pusheen with Ice Cream


|
Materials
If you are new to crocheting and don't want to buy everything separately, i recommend to get a crochet Starter Kit with the main tools.
Yarn in the colors: dark grey, light grey, for ice cream: light brown, rosé, red, green
Yarn strength: DK light worsted, number 3 yarn -> i used Milk Cotton Yarn
for ice cream and cherry: sport/baby yarn, number 2 -> for example
Embroidery thread: black or dark grey for nose & mouth, i used dark grey yarn for it, several colors for ice cream sprinkles
Embroidery needle
sewing pins -> i recommend getting a bunch of sewing pins, because they tend to get lost or bent a little bit
Stitch markers -> i use these (use a stitch marker in the last stitch of each round, moving it up as you go) Also, check out these cute stitch markers!
Hook: size 4/2.5 mm -> my go-to and absolute favourite crochet hooks are these Japanese Tulip Etimo Rose crochet hooks. I use them all the time!
Yarn Needle
Scissors or cutter
OR: If you prefer a cutter - like me - i really recommend this quick to grab yarn cutter
Stuffing -> i use this poly-fil stuffing, i recommend getting a larger amount, because in my experience it's used up fairly quickly
Check out this super practical yarn bowl!
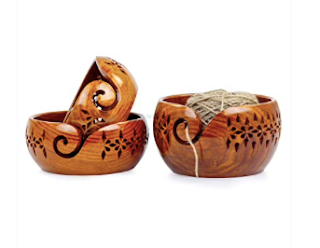
I just got one and it's amazing, it's heavy enough to not move when i pull on the yarn and no more chasing of yarn that's rolling around in my flat.
Pattern Notes
Size of finished cat: approx. 17 cm tallThe pattern is worked in continuous spiral rounds, without closing off the round with a slst. Head and body are crocheted in one piece. The other parts are crocheted separately and then sewn on.
Feel free to use the yarn and matching crochet hook of your choice to make Pusheen with Ice Cream.
The result will be bigger or smaller keeping the same proportions.
Click on the picture to receive the FREE premium PDF pattern!


Head/Body
With light grey yarn
R1: 6 sc in magic ring (6)
R2: 2 sc in each stitch around (12)
R3: (1 sc, inc) x6 (18)
R4: (2 sc, inc) x6 (24)
R5: (3 sc, inc) x6 (30)
R7: (4 sc, inc) x6 (36)
R8: (5 sc, inc) x6 (42)
R9: (6 sc, inc) x6 (48)
R10: (7 sc, inc) x6 (54)
R11: (8 sc, inc) x6 (60)
R12: (9 sc, inc) x6 (66)
R13: (10 sc, inc) x6 (72)
R14: (11 sc, inc) x6 (78)
R15: (12 sc, inc) x6 (84)
R16: (13 sc, inc) x6 (90)
R17: (14 sc, inc) x6 (96)
R18-31 (14 rounds): sc around (96)
R32: 14 sc, invdec* (90) *see video below
R33-36 (4 rounds): sc around (90)
R37: (13 sc, invdec) x6 (84)
R38-41 (4 rounds): sc around (84)
R42: (12 sc, invdec) x6 (78)
R43-44 (2 rounds): sc around (78)
R45: (11 sc, invdec) x6 (72)
R46-49 (4 rounds): sc around (72)
R50: (10 sc, invdec) x6 (66)
Add safety eyes between round 42 and 43. With 11 stitches in between. Stuff as you go.
R51: (9 sc, invdec) x6 (60)
R52: (8 sc, invdec) x6 (54)
R53: (7 sc, invdec) x6 (48)
R54: (6 sc, invdec) x6 (42)
R55: (5 sc, invdec) x6 (36)
R56: (4 sc, invdec) x6 (30)
R57: (3 sc, invdec) x6 (24)
R58: (2 sc, invdec) x6 (18)
R59: (1 sc, invdec) x6 (12)
R60: invdec around (6)
To close the last round, cut yarn, leaving a yarn end. With a yarn-needle go into outer loops from inside out, pull tight to close hole. See video below:
Invisible decrease:
@roxyscrochet Interesting Facts About Crochet Part 1. 🧶 #crochet #amigurumi #interestingfacts #crochettips ♬ original sound - RoxysCrochet
Ears (2x)
With light-grey
R1: 6 sc in magic ring (6)
R2: (1 sc, inc) x3 (9)
R3: sc around (9)
R4: (1 sc, inc) x3, 3 sc (12)
R5: (1 sc, inc) x6 (18)
R6: sc around (18)
R7: (1 sc, inc) x6, 6 sc (24)
R8: sc around (24)
R9: (2 sc, inc) x6, 6 sc (30)
Cut yarn. Keep a longer yarn tail for sewing. The side with the increases will later be at the outer edge of the head and the side without will be on the inner side.
Stripes on the back
With dark-grey
Smaller stripe:
R1: ch 26, beginning in second ch from hook 25 sc, ch1, turn
R2: 25 sc, ch 1, turn
R3: 25 sc, (inc) x3, 22 sc, (inc) x3, slst (60)
Bigger stripe:
R1: ch 29, beginning in second ch from hook 28 sc, ch 1, turn
R2: 29 sc, ch 1, turn
R3: 27 sc, (inc) x3, 26 sc, (inc) x3, 1 sc, slst (67)
Cut yarn. Leave a long piece of yarn to sew the stripes to the back later.
Tail
With dark-grey
R1: 6 sc in magic ring (6)
R2: 2 sc in each stitch around (12)
R3-4: sc around (12)
Color change to light-grey
R4-7 (4 rounds): sc around (12)
Change to dark-grey
R7-10 (4 rounds): sc around (12)
Change to light-grey
R11-14 (4 rounds) sc around (12)
Change to dark grey:
R15-18 (4 rounds) sc around (12)
Stuff tail. Hold both sides of the last round together. Slst across to close the tail. Cut yarn, leaving a yarn end for sewing on the body later.
Hands/Feet (x4)
R1: 6 sc in magic ring (6)
R2: 2 sc in each stitch around (12)
R3-4: sc around (12)
R5: (1 sc, invdec) x3, 3 sc (9) Stuff.
By the way - check out this super practical yarn bowl!
I just got one and it's amazing, it's heavy enough to not move when i pull on the yarn and no more chasing of yarn that's rolling around in my flat.
Ice Cream
with rosé yarn
R1: 6 sc in magic ring (6)
R2: 2 sc in each stitch around (12)
R3: (1 sc, inc) x6 (18)
R4: (2 sc, inc) x6 (24)
R5: (3 sc, inc) x6 (30)
R6-10 (5 rounds): sc around (30)
R11: (3 sc, invdec) x6 (24)
R12: in FLO: [(hdc + sc)* x3, slst in next
stitch, skip one stitch] repeat around
*in same stitch
R13: in BLO sc around (24)
Color change to brown:
R14-15: Sc around (24)
R16: (3 sc, invdec) x4, 3 sc (19)
R17: 17 sc, invdec (18)
R18: 7 sc, invdec, 6 sc, invdec, 1sc (16)
R19: sc around (16)
Stuff icecream.
R20: (1 sc, invdec) x5, 1sc (11)
R21: invdec, 9 sc (10)
R22: Invdec around (5)
Cut yarn, hide yarn end. Embroider ice cream sprinkles.
With red yarn
R1: 6 sc in magic ring (6)
R2: 2 sc in each stitch around (12)
R3-4: sc around (12)
Stuff.
R4: invdec around (6)
Close last round
With green yarn


Assembly
Sew on ears, tail and feet. Position the tail and feet so that the cat can stand.
Sew on stripes, the smaller stripe on top.
Embroider on hair, by taking the yarn double and going over twice each stripe.
Embroider on nose/mouth with dark grey/black yarn between the eyes. Embroider on whiskers.
Then position the ice cream and sew on the hands to the body. Sew ice cream to the hands.
Mattress Stitch:
Congrats!
You now have created Pusheen with Ice Cream!
Show me your creation by linking me (@rxy_crochet) in your Instagram-picture!

Gato Pusheen y su helado
Patrón gratis de Roxy’s Crochet
Traducido al español por @colorita_amigurumi
Traducido al español por @colorita_amigurumi


Click on the picture to receive the FREE premium PDF pattern!
pt pe | Punto Punto enano |
mp | Medio punto |
aum dism | Aumento Disminución invisible |
FLO | Tejer solo tomando la hebra delantera |
V numero | Vuelta/s numero |
(numero) cad pmv BLO | Numero de puntos en la vuelta. Cadeneta Media vareta Tejer solo tomando la hebra trasera |

Materiales
Hilados de color: gris oscuro, gris claro, para el helado: café claro, rosado, rojo, verde
Grosor del hilado: DK light worsted (ligero), hilado numero 3; 200-250mt/100gr
Para el helado: sport/baby (fino), hilado numero 2; 250-350mt/100gr
Hilo de bordar: negro o gris oscuro para la nariz y boca
Aguja para bordar
Alfileres
Marcador de puntos
Ojos de seguridad: 12mm
Ganchillo de crochet: tamaño 4/2.5 mm
Aguja tapicera
Tijeras
Relleno
By the way - check out this super practical yarn bowl!
I just got one and it's amazing, it's heavy enough to not move when i pull on the yarn and no more chasing of yarn that's rolling around in my flat.
Notas sobre el patrón
Altura del Gato terminado: 17 cm aprox.
El patrón se trabaja en un espiral continuo, sin cerrar la vuelta con un punto enano (pe). La cabeza y el cuerpo están tejidos en una sola pieza, las otras partes se tejen aparte y luego se cosen.
Puedes utilizar el hilado y el ganchillo de crochet que quieras para realizar el gato pusheen con helado. El resultado será mas grande o pequeño manteniendo las mismas proporciones
Check out my other patterns on Ravelry

and Etsy:

Cabeza/Cuerpo
Con gris claro
V1: Teja un anillo mágico de 6mp (6)
V2: 2 mp en cada uno de los 6mp (12)
V3: (1 mp, aum) x6 (18)
V4: (2 mp, aum) x6 (24)
V5: (3 mp, aum) x6 (30)
V7: (4 mp, aum) x6 (36)
V8: (5 mp, aum) x6 (42)
V9: (6 mp, aum) x6 (48)
V10: (7 mp aum) x6 (54)
V11: (8 mp, aum) x6 (60)
V12: (9 mp, aum) x6 (66)
V13: (10 mp, aum) x6 (72)
V14: (11 mp, aum) x6 (78)
V15: (12 mp, aum) x6 (84)
V16: (13 mp, aum) x6 (90)
V17: (14 mp, aum) x6 (96)
V18-31 (14 vueltas): 1 mp en cada uno de los 96 mp (96)
V32: (14 mp, dism) x6 (90)
V33-36 (4 vueltas): 1 mp en cada uno de los 90 mp (90)
V37: (13 mp, dism) x6 (84)
V38-41 (4 vueltas): 1 mp en cada uno de los 84 mp (84)
V42: (12 mp, dism) x6 (78)
V43-44 (2 vueltas): 1 mp en cada uno de los 78mp (78)
V45: (11 mp, dism) x6 (72)
V46-49 (4 vueltas): 1 mp en cada uno de los 72 mp (72)
V50: (10 mp, dism) x6 (66)
Coloque los ojos de seguridad entre la vuelta 42 y 43, con 11 puntos de distancia, rellena en la medida que vas tejiendo
V51: (9 mp, dism) x6 (60)
V52: (8 mp, dism) x6 (54)
V53: (7 mp, dism) x6 (48)
V54: (6 mp, dism) x6 (42)
V55: (5 mp, dism) x6 (36)
V56: (4 mp, dism) x6 (30)
V57: (3 mp, dism) x6 (24)
V58: (2 mp, dism) x6 (18)
V59: (1 mp, dism) x6 (12)
V60: 6 dism (6)
Invisible decrease:
@roxyscrochet Interesting Facts About Crochet Part 1. 🧶 #crochet #amigurumi #interestingfacts #crochettips ♬ original sound - RoxysCrochet

Para terminar, la ultima vuelta, corte dejando una hebra larga para cerrar los últimos 6 puntos. Con la aguja tapicera pase por al medio de cada punto y ajuste hasta cerrar el agujero. Remate.
Orejas (2x)
Con gris Claro
V1: Teja un anillo mágico de 6mp (6)
V2: (1 mp, aum) x3 (9)
V3: 1 mp en cada uno de los 9 mp (9)
V4: (1 mp, aum) x3, 3 mp (12)
V5: (1 mp, aum) x6 (18)
V6: 1 mp en cada un de los 18 mp (18)
V7: (1 mp, aum) x6, 6 mp (24)
V8: 1mp en cada uno de los 24 mp (24)
V9: (2 mp, aum) x6, 6 mp (30)
Para terminar, corte dejando una hebra larga para coser. El lado con los aumentos va en el lado exterior de la cabeza y el lado sin aumentos estará en el lado interior.
Rayas de la espalda
Con gris oscuro
Raya pequeña:
V1: teja una cadeneta de 26 cad, comience en el segundo p de la cad desde el ganchillo, 25 mp, 1 cad, gire el tejido.
V2: 25 mp, 1 cad, gire el tejido
V3: 25 mp, (aum) x3, 22 mp, (aum) x3, pe (60)
Raya grande:
V1: teja una cadeneta de 29 cad, comience en el segundo p de la cad desde el ganchillo, 28 mp, 1 cad, gire el tejido
V2: 29 mp, 1 cad, gire el tejido
V3: 27 mp, (aum) x3, 26 mp, (aum) x3, 1 mp, pe (67)
Corte dejando una hebra larga para luego coser las rayas en la espalda.
Cola
Con gris oscuro
V1: Teja un anillo mágico de 6mp (6)
V2: 2 mp en cada uno de los 6mp (12)
V3-4: 1 mp en cada uno de los 12 mp (12)
Cambia de color a gris claro:
V4-7 (4 vueltas): 1 mp en cada uno de los 12 mp (12)
Cambia de color a gris oscuro:
V7-10 (4 vueltas): 1 mp en cada uno de los 12 mp (12)
Cambia de color a gris claro:
V11-14 (4 vueltas) 1 mp en cada uno de los 12 mp (12)
Cambia de color a gris oscuro:
V15-18 (4 vueltas) 1 mp en cada uno de los 12 mp (12)
Rellena la cola. Junte los dos lados de la ultima vuelta y cósalos con punto enano para cerrar la cola. Corte y deje una hebra larga para coserlo al cuerpo.
Wooden Yarn Bowl

Manos/pies (x4)
V1: Teja un anillo mágico de 6mp (6)
V2: 2 mp en cada uno de los 6mp (12)
V3-4: 1 mp en cada uno de los 12 mp (12)
V5: (1 mp, dism) x3, 3 mp (9)
Rellene.
Helado
Con rosado
V1: Teja un anillo mágico de 6mp (6)
V2: 2 mp en cada uno de los 6mp (12)
V3: (1 mp, aum) x6 (18)
V4: (2 mp, aum) x6 (24)
V5: (3 mp, aum) x6 (30)
V6-10 (5 vueltas): 1mp en cada uno de los 30mp (30)
V11: (3 mp, dism) x6 (24)
V12: Teja tomado solo la hebra delantera: [(pmv + mp)* x3, pe en el siguiente punto, sáltate un punto ] repite hasta terminar la vuelta.
*en el mismo punto.
V13: Teja tomando solo la hebra trasera (BLO), 1 mp en cada uno de los 24 mp (24)
Cambie de color a café:
V14-15: 1 mp en cada uno de los 24 mp (24)
V16: (3 mp, dism) x4, 3 mp (19)
V17: 17 mp, dism (18)
V18: 7 mp, dism, 6 mp, dism, 1 mp (16)
V19: 1 mp en cada uno de los 16 mp (16)
Rellena el helado.
V20: (1 mp, dism) x5, 1 mp (11)
V21: dism, 9 mp (10)
V22: 5 dism (5)
Corte y esconda la hebra.
I am happy and honored you enjoy my patterns!
To make more free patterns for you in the future
i will need lots of coffee. :D
Would you like to support my work?
You can buy me a coffee here:


Thank you! This means the world to me! <3
Cereza
Con Rojo
V1: Teja un anillo mágico de 6mp (6)
V2: 2 mp en cada uno de los 6mp (12)
V3-4: 1 mp en cada uno de los 12 mp (12)
Rellene.
V4: 6 dism (6)
Cierre la ultima vuelta.
Con verde: Teja una cadeneta de 11 cad, comience en el segundo p de la cad desde el ganchillo, 10 pe.
Remate y corte la hebra.
Cosa el tallo a la cereza y la cereza al helado.

Montaje
Cosa las orejas, la cola y los pies. Posicione la cola y los pies para que el gato se mantenga parado.
Cosa las rayas, la raya mas pequeña arriba.
Cosa el pelo, utilizando el hilado doble y pasando dos veces por el mismo lugar.
Borde la nariz y boca con gris oscuro/negro entre los ojos. Borde los bigotes.
Coloque el helado entre las manos y cosa las manos al cuerpo y luego el helado a las manos.
Mattress Stitch:
¡Felicitaciones!
¡¡Has creado el gato Pusheen con un helado!!
Muéstrame tus creaciones etiquetándome en tus publicaciones de Instagram!! (@rxy_crochet)here