#RXYCROCHETALONG
Stitch - the cutest Alien on Earth
für die DEUTSCHE ANLEITUNG bitte nach unten scrollen
Subscribe to my Newsletter to get a FREE premium PDF pattern!
Today i want to start a crochet along with you guys!
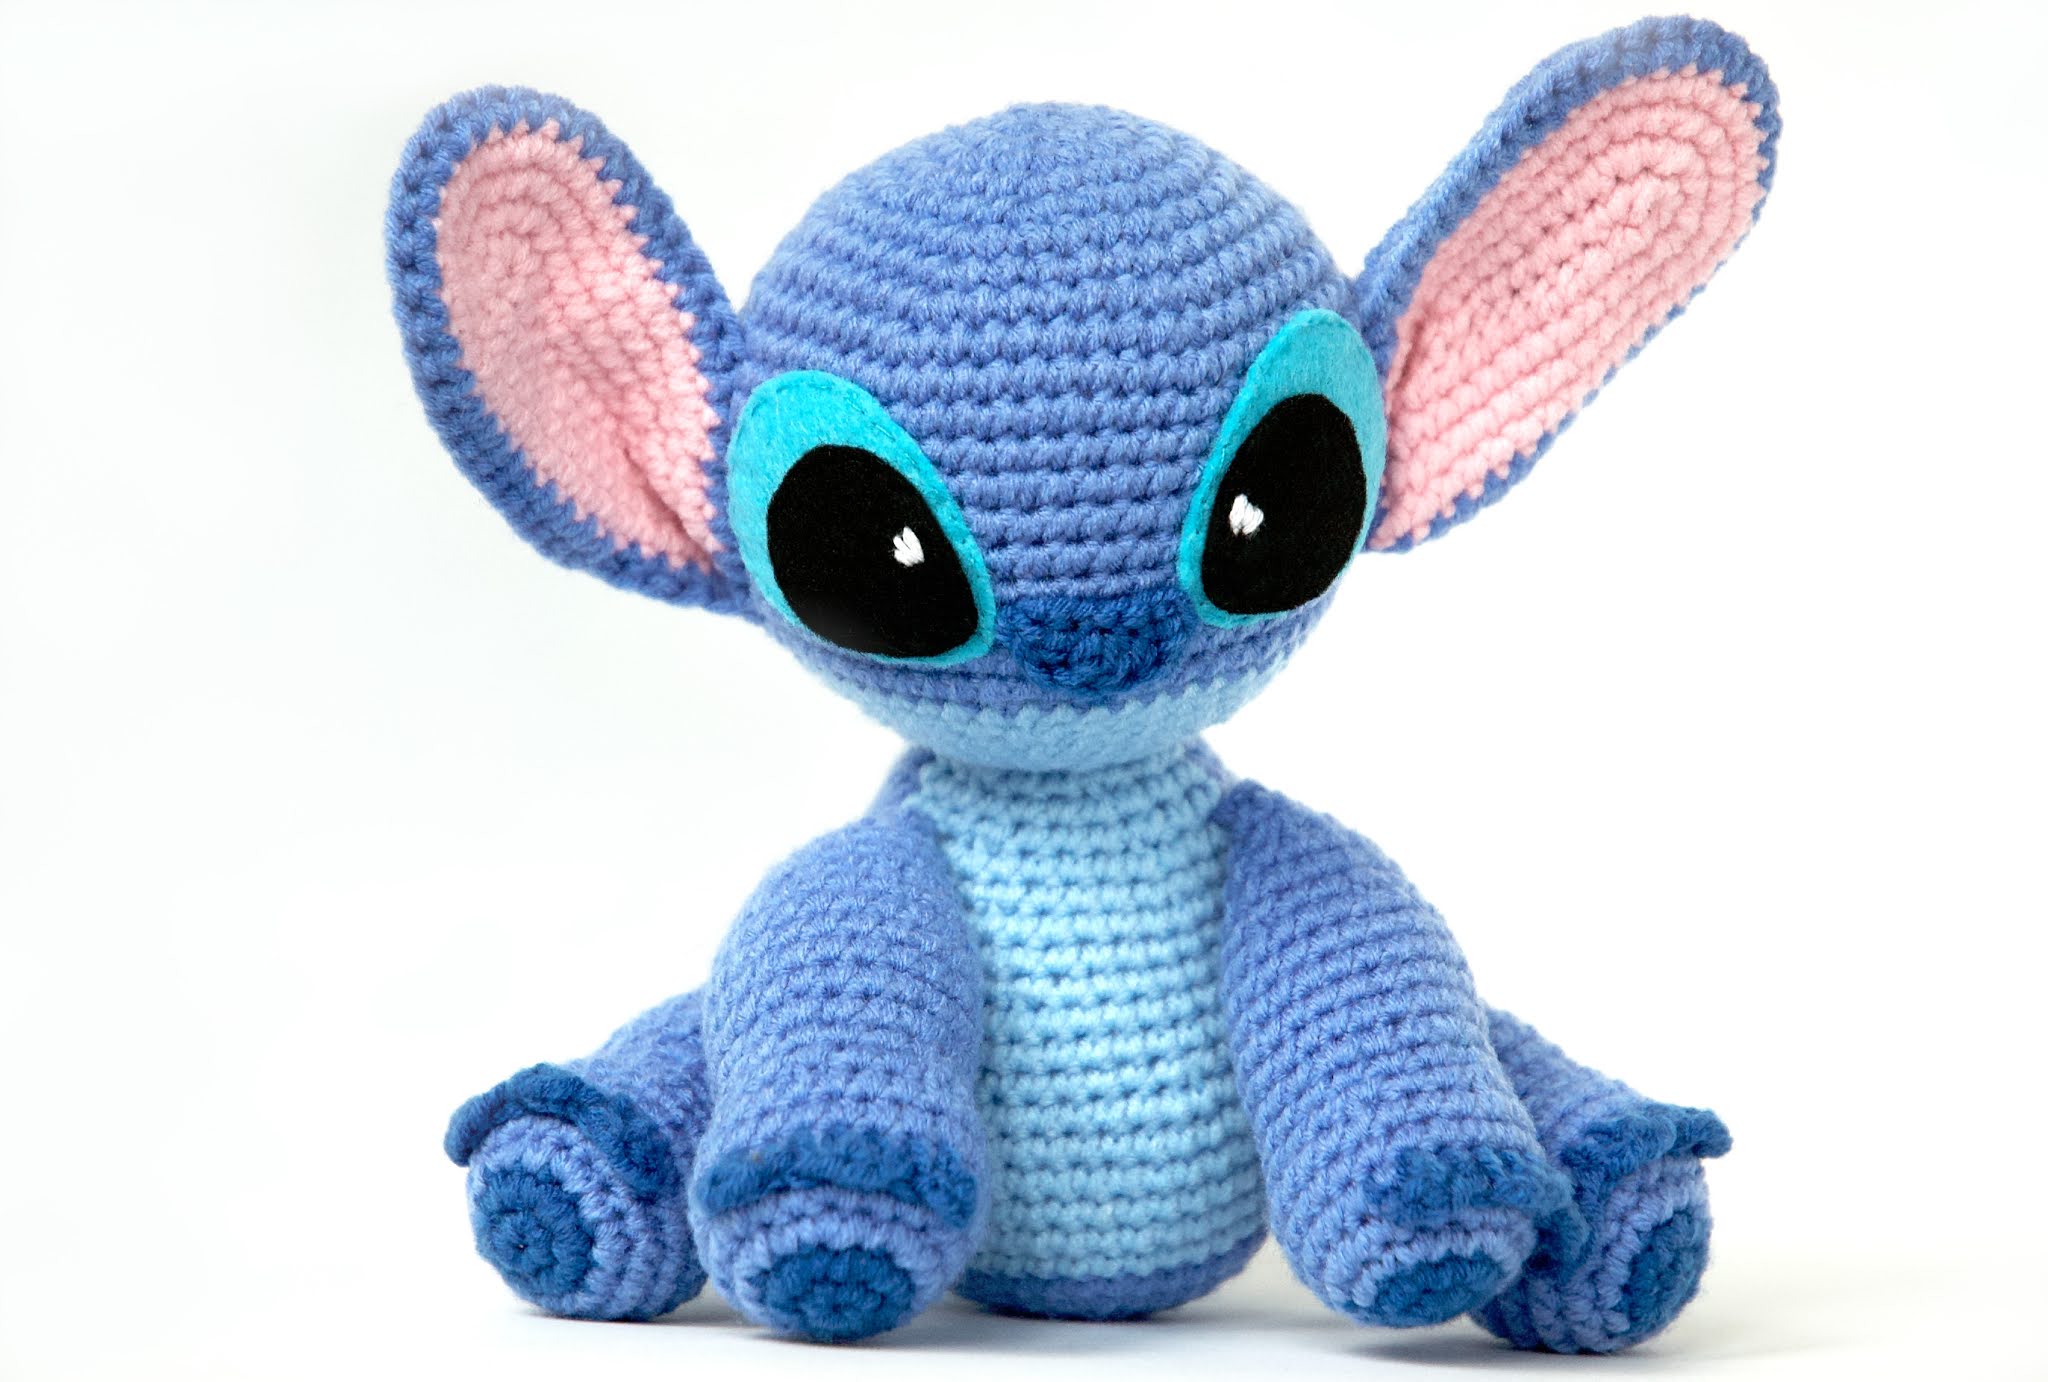
Together we will make Stitch! Are you down?
I would love if we do this together, i think this way it's definitely more motivating. On Instagram and FB i will let you know when i posted a new step on my blog (every one to two days).
So stay tuned on my social media and then let's do this project together in small digestible steps.
To make this even more fun and motivating take a picture when you're done with the step for the day, link me in it and tag it with #rxycrochetalong and i will share it!
In the end i would love if you link me in you finished project so i can show everyone how talented you guys are!
Finished Stitch is approx. 18 cm tall.
Feel free to use the yarn and matching crochet hook of your choice to make Stitch. The result will be bigger or smaller keeping the same proportions.
Yarn in the colors: dark blue, medium blue, light blue and rose
R1: 6 sc in magic ring (6)
R2: 2 sc in each stitch around (12)
R3: (1 sc, inc) x6 (18)
R4: (2 sc, inc) x6 (24)
R5: (sc in next 3 st, inc) x6 (30)
R6: (sc in next 4 st, inc) x6 (36)
R7: (sc in next 5 st, inc) x6 (42)
R8: (sc in next 6 st, inc) x6 (48)
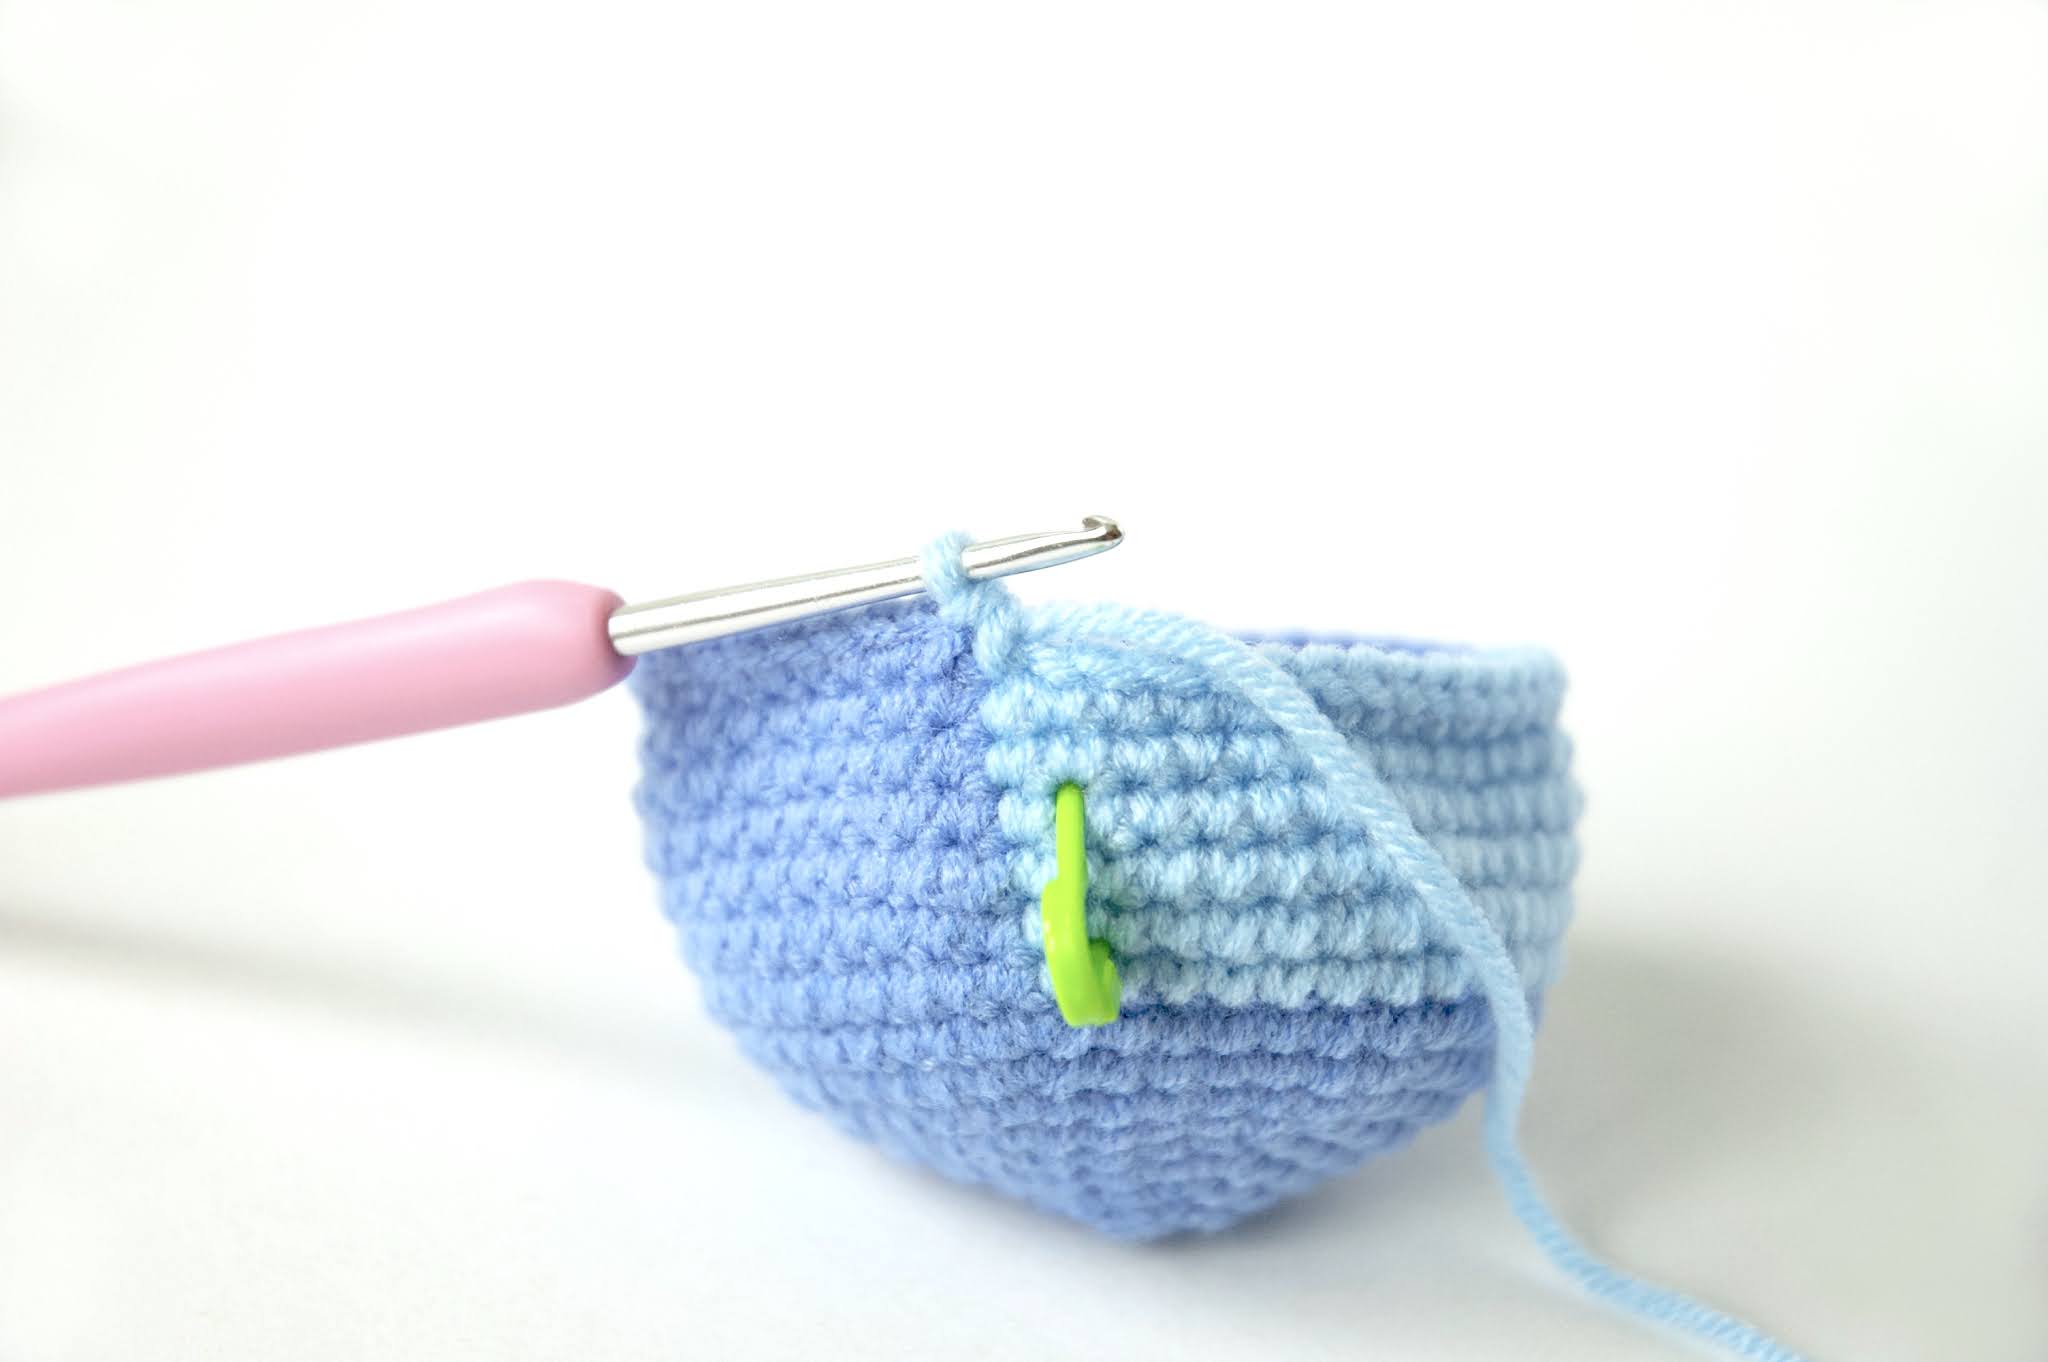
R9: sc around for 46 sc. Finish 47th stitch by pulling up a loop with medium blue and finish it with light blue. 1 sc in light blue. (48)
I recommend to cut the yarn after every color change and knot the ends.
R10-15:
15 sc in light blue. Finish 16th stitch with medium blue.
Crochet 30 sc with medium blue, finish 31th stitch with light blue and make the last stitch in light blue aswell. (48)
R16:
in light blue: (3 sc, invdec), 6 sc, invdec, 2 sc, color change (1sc)
in medium blue: 3 sc, invdec, (6 sc, invdec) x 3, 1 sc, color change (1sc), 1sc (42)
R17-18:
in light blue: 14 sc, finish 15th stitch with medium blue
in medium blue: sc to the end, finish last stich with light blue (42)
R19:
in light blue: (5 sc, invdec) x2, (pull up loop, finish with medium blue) (1sc),
in medium blue: 4sc, invdec, (5 sc, invdec) x2, 5 sc, do the invdec by pulling up a light blue yarn and finish with light blue. (36)
R20: in light blue: sc 12, colorchange to medium blue (1sc)
in medium blue: 22, colorchange to light blue(1sc) (36)
R21: in light blue: sc 13, colorchange, (1sc), 21 sc, color change (1sc) (36)
R22:
in light blue: (4 sc, invdec) x2, 1 sc, color change (1sc)
in medium blue: sc 2, invdec, (4sc, invdec) x2, 4sc, invdec, finish invdec with light blue (30)
R23: sc around (and do the color changes) (30)
Stuff the body and add more stuffing at the end.
R24: in light blue: (3 sc, invdec) x2, 1 sc, colorchange (1sc)
in medium blue: 1 sc, invdec, (3 sc, invdec) x2, 3 sc, pull up through both loops with medium blue, finish invdec with light blue (24)
R25: sc around and make the color changes(24)
R26: (2 sc, invdec) x2, 1 sc, color change (1sc), invdec, (2 sc, invdec) x3 (18)
Cut the yarn and hide the yarn end.
Step 4
Sew head and body together with the mattress stitch.
Legs (x2)
in dark blue:
R1: 6 sc in mr (6)
R2: inc around (12)
Color change to medium blue:
R3: (1 sc, inc) x6 (18)
R4: (2 sc, inc) x6 (24)
R5-7: sc around (24)
R8: (2 sc, invdec) x6 (18)
R9: sc around (18)
R10: (2 sc, inc) x6 (24)
R11-14: sc around (24)
R15: (2 sc, invdec) x6 (18)
R16-17: sc around (18)
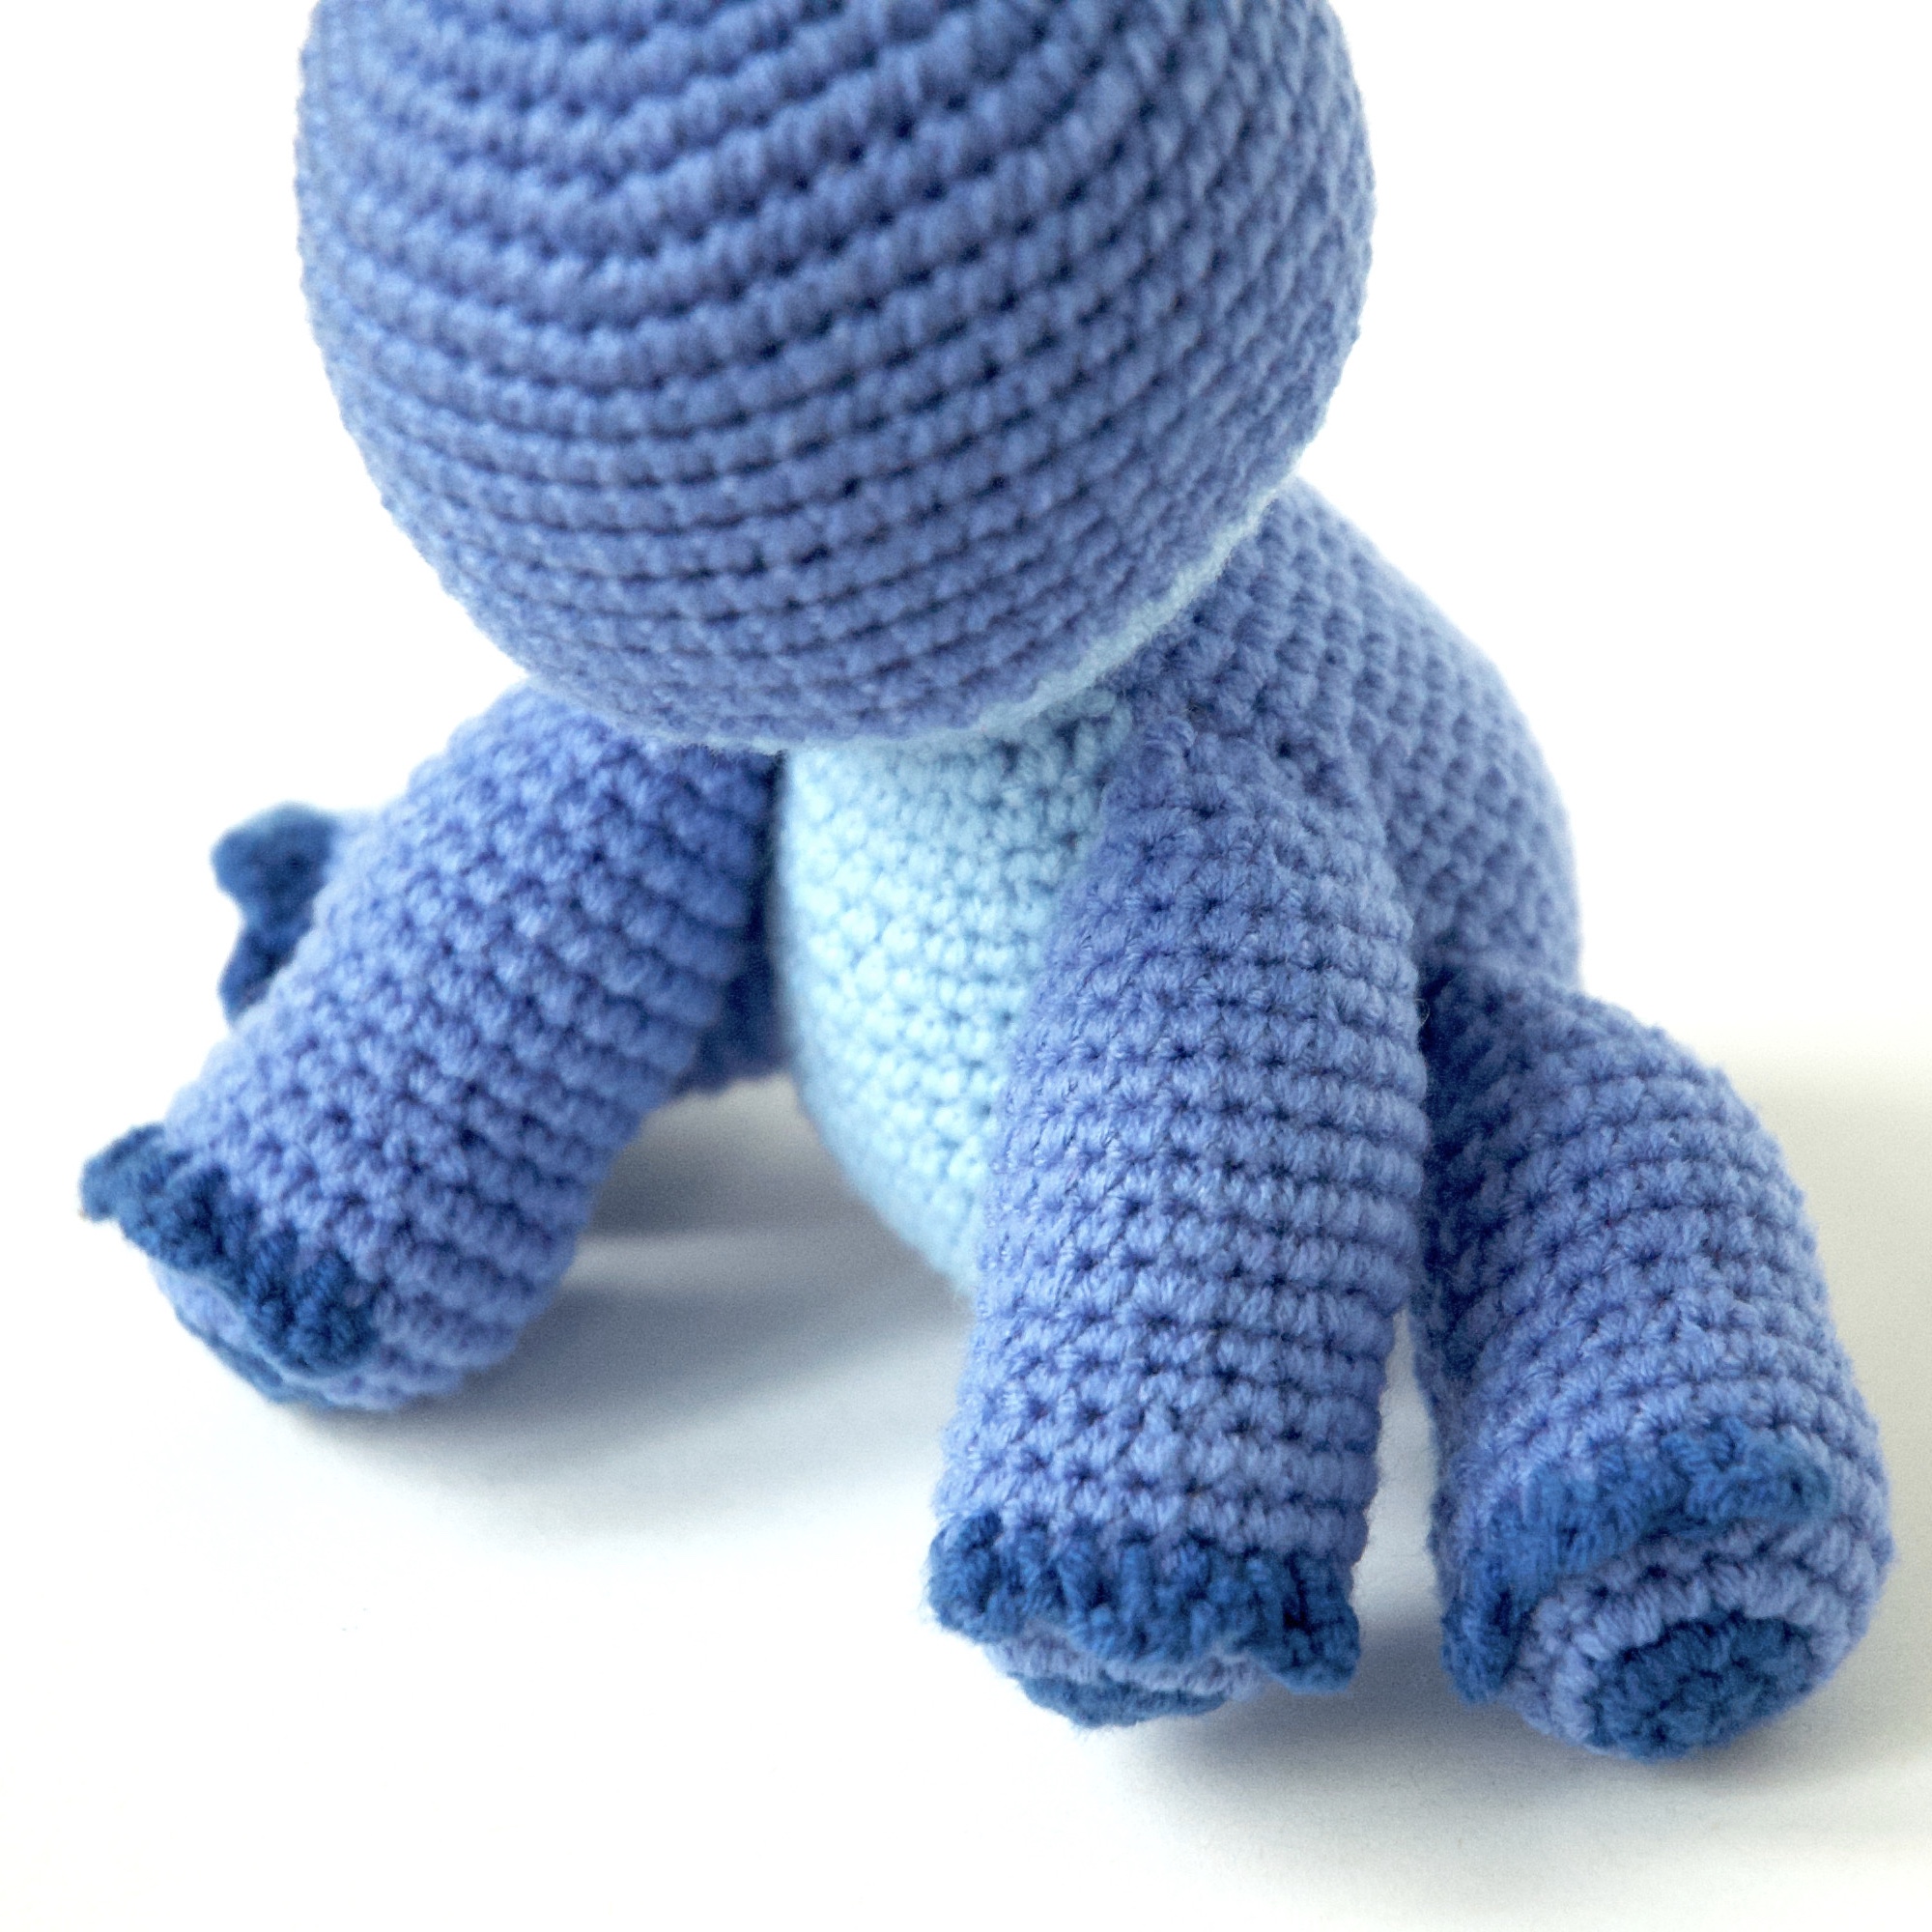
Fill the leg, hold the sides of the edge together and crochet along the top to close it. Cut yarn leaving a yarn end for sewing.
Now we are going to surface stitch between round 4 and five, so the claws will go over the fifth round. Attach yarn to foot, it's important that the claws are there where the end of the closing row is, so they point upwards when we sew the legs on. Attach yarn accordingly. See photo.
Claw 1: ch 1, in next st: dc, ch 1, in next stitch sc
Claw 2: in next stitch slst and ch 2, in next st: dc, ch1, sc in next stitch
Claw 3: slst in next stitch, ch 2, dc, ch 1, slst
Cut yarn and hide yarn ends.
Step 5
Arms (x2)
in dark blue
R1: 6 sc in MR (6)
R2: 2 sc in every stitch around (12)
Color change to medium blue
R3: (1 sc, inc) x6 (18)
R4: (2 sc, inc) x6 (24)
R5-7: sc around (24)
R8: (2 sc, invdec) x6 (18)
R9: sc around (18)
R10: (2 sc, inc) x6 (24)
R11-15: sc around (24)
R16: (2 sc, invdec) x6 (18)
R17-18: sc around (18)
Stuff the leg.
R19: (1sc, invdec) x6 (12)
R20: sc around (12)
Crochet across the edge to close it. Cut yarn, leaving a yarn end for sewing.
This time the claws end there where the end of the closing row is, so they point the right way when we sew the arms on. Attach yarn accordingly. See photo:
R1: 6 sc in magic ring
R2: inc around (12)
R3: sc around (12)
R4: (1sc, inc) x6 (18)
R5: (1sc, invdec) x6 (12)
Cut yarn leaving a yarn end for sewing.
Step 8
Eyes
Cut out the eyes in the size and shape you see in the pictures. With black sewing thread sew the black part to the light blue part. Then sew on a white dot with white sewing thread or embroidery thread.
Pin the eyes on the head. Position them as seen in the pictures: With the lower edge one round above the line of the color change. With the upper edge between round 10 and 11.
The outer sides should be in line with the upper part of the arms.
Leave about 5 stitches space between them.
Pin the ears to the head, to check if everything fits.
You smell like wet leaves on the ground.
You feel like long walks on Sundays.
You look like red, yellow and orange trees glowing in the sun.
You taste like hot chocolate and pumpkin pie.
You are soft like thick socks and warm blankets on the couch
You call for watching all Seasons of Gilmore Girls again.
Oh Fall - you are my favourite time of the year!
Nose
With dark blue. Leave a long yarn tail at the beginning.
Ch 5, ch 1 turning chain.
Slst in next ch, ch 1. Hdc in next ch. 2 dc in next ch. Hdc in next. Ch 1, slst in last ch. Cut yarn, hide yarn end.
Sew on the nose between the eyes, with the round edge showing downwards.
Sew on the eyes with light blue sewing thread.
Step 9
Congrats! You have now made a super cute Stitch! Show me your creation by linking me in your photo @rxy_crochet!
Check out my other patterns on Ravelry
Liebe Häkelfreunde!
Heute möchte ich ein CAL (crochet along) mit euch starten!
Wir werden gemeinsam einen Stitch häkeln. Seid ihr dabei?
Ich würde mich sehr freuen, denn gemeinsam ist es noch viel motivierender! Ich werde alle 2 Tage auf Instagram und Facebook Bescheid geben, wenn ein neuer Schritt in meinem Blog online ist.
Also bleibt über meine sozialen Kanäle auf dem Laufenden und dann legen wir los und häkeln einen niedlichen Stitch in kleinen, verdaulichen Schritten.
Damit das ganze noch mehr Spaß macht, würde ich mich freuen, wenn ihr ein Foto von jedem Tages-Schritt macht, mich darin markiert und mit dem Hashtag #rxycrochetalong verseht. Ich werde es dann teilen!
Am Ende könnt ihr mich im Foto des fertigen Projekts markieren, dann kann ich allen zeigen, wie talentiert ihr seid!
Also legen wir los!
Garn in den Farben: dunkelblau, mittelblau, hellblau, rosa
R1: 6 FM in MR (6)
R2: 2 FM in jede M (12)
R3: (1 FM, Zun.) x6 (18)
R4: (2 FM, Zun.) x6 (24)
R5: (3 FM, Zun.) x6 (30)
R6: (4 FM, Zun.) x6 (36)
R7: (5 FM, Zun.) x6 (42)
R8: (6 FM, Zun.) x6 (48)
R9: 1 FM in 46 Maschen. 47. Masche mit mittelblau aufnehmen und mit hellblau abschliessen. 1 FM in hellblau (48)
Nach jedem Farbwechsel den Faden abschneiden und die Fadenenden zusammenknoten.
R10-15:
in hellblau: 15 FM
16. Masche mit mittelblau abschliessen.
30 FM mit mittelblau häkeln, die 31. Masche mit hellblau abschliessen und die letzte Masche in hellblau häkeln. (48)
R16:
in hellblau: (3 FM, uns. Abn.), 6 FM, uns. Abn., 2 FM, Farbwechsel (1 FM)
in mittelblau: 3 FM, uns. Abn, (6 FM, uns. Abn) x 3, 1 FM, Farbwechsel, 1 FM (42)
R17-18:
in hellblau: 14 FM, 15. Masche mit mittelblau abschliessen
in mittelblau: FM in jede M, letzte FM mit hellblau abschliessen (42)
R19:
in hellblau: (5 FM, uns. Abn) x2, (Masche aufnehmen, mit mittelblau abschliessen) (1 FM),
in mittelblau: 4 FM, uns. Abn, (5 FM, uns. Abn) x2, 5 FM, fuer Abnahme Masche mit hellblau aufnehmen und abschliessen (36)
R20: in hellblau: 12 FM, Farbwechsel zu mittelblau (1 FM)
in mittelblau: 22 FM, Farbwechsel zu hellblau (1 FM) (36)
R21: in hellblau: 13 FM, Farbwechsel, (1 FM), 21 FM, Farbwechsel (1 FM) (36)
R22:
in hellblau: (4 FM, uns. Abn) x2, 1 FM, Farbwechsel (1 FM)
in mittelblau: 2 FM, uns. Abn., (4 FM, uns. Abn) x2, 4 FM, uns. Abn, uns. Abn mit hellblau abschliessen (30)
R23: 1 FM in jede M (Farbwechsel machen) (30)
Körper füllen und am Ende nachfüllen.
R24: in hellblau: (3 FM, uns. Abn) x2, 1 FM, Farbwechsel (1 FM)
in mittelblau: 1 FM, uns. Abn, (3 FM, uns. Abn) x2, 3 FM, durch zwei Maschen mit mittelblau Masche aufnehmen, mit hellblau beenden (24)
R25: FM in jede M (Farbwechsel machen) (24)
R26: (2 FM, uns. Abn.) x2, 1 FM, Farbwechsel (1 FM), uns. Abn, (2 FM, uns. Abn) x3 (18)
Garn abschneiden und vernähen.
Schritt 4
Kopf und Körper zusammennähen, siehe Video.
Beine (2x)
in dunkelblau:
R1: 6 FM in MR (6)
R2: 2 FM in jede M (12)
Farbwechsel zu mittelblau:
R3: (1 FM, Zun.) x6 (18)
R4: (2 FM, Zun.) x6 (24)
R5-7: 1 FM in jede M (24)
R8: (2 FM, uns. Abn.) x6 (18)
R9: 1 FM in jede M (18)
R10: (2 FM, Zun.) x6 (24)
R11-14: 1 FM in jede M (24)
R15: (2 FM, uns. Abn.) x6 (18)
R16-17: 1 FM in jede M (18)
You smell like wet leaves on the ground.
You feel like long walks on Sundays.
You look like red, yellow and orange trees glowing in the sun.
You taste like hot chocolate and pumpkin pie.
You are soft like thick socks and warm blankets on the couch
You call for watching all Seasons of Gilmore Girls again.
Oh Fall - you are my favourite time of the year!
Bein füllen den Rand zusammenhalten und enlang häkeln um ihn zu schliessen. Garn abschneiden und Fadenende zum Nähen stehen lassen.
Jetzt werden wir zwischen Runde 4 und 5 also auf der 5. Masche entlang häkeln. Es ist wichtig, dass sich die Krallen dort befinden, wo sich das Ende des zugehäkelten Randes befindet. So zeigen sie nach oben, wenn wir die Beine annähen. Garn entsprechend anbringen. Siehe Foto.
Kralle 1: 1 LM, in nächste M: 1 Stb, 1 LM, in nächste M 1 FM
Kralle 2: in nächste M 1 KM und 2 LM, in nächste M: 1 Stb, 1 LM, FM in nächste M
Kralle 3: KM in nächste M, 2 LM, 1 Stb, 1 LM, KM
Garn abschneiden und vernähen.
Schritt 5
Arme (x2)
in dunkelblau
R1: 6 FM in MR (6)
R2: 2 FM in jede M (12)
Farbwechsel zu mittelblau.
R3: (1 FM, Zun.) x6 (18)
R4: (2 FM, Zun.) x6 (24)
R5-7: 1 FM in jede M (24)
R8: (2 FM, uns. Abn.) x6 (18)
R9: 1 FM in jede M (18)
R10: (2 FM, Zun.) x6 (24)
R11-15: 1 FM in jede M (24)
R16: (2 FM, uns. Abn.) x6 (18)
R17-18: 1 FM in jede M (18)
Bein füllen.
R19: (1 FM, uns. Abn.) x6 (12)
R20: 1 FM in jede M (12)
Entlang der Kante häkeln um sie zu schliessen.
Diesmal enden die Krallen in einer Linie zum Ende der zugehäkelten letzten Reihe. Damit sie in die richtige Richtung zeigen, wenn wir die Arme annähen. Garn entsprechend anbringen. Siehe Foto:
Die Krallen werden genauso gehäkelt wie bei den Beinen.
Schritt 6
Schwänzchen
R1: 6 FM in MR
R2: 2 FM in jede M (12)
R3: 1 FM in jede M (12)
R4: (1 FM, Zun.) x6 (18)
R5: (1 FM, uns. Abn.) x6 (12)
Garn abschneiden und ein Ende zum Nähen lassen.
Schritt 7
Arme und Beine annähen
Heute nähen wir die Arme und Beine an. Den oberen Teil der Arme zwischen Runde 23 und 24, eine Masche ins hellblau hinein annähen.
Die Unterseite der Beine beginnt ca. zwischen Runde 7 und 8 und die Oberseite zwischen Runde 15 und 16. Die Beine sind 3 Maschen vom hellblauen Bereich entfernt.
Augen so ausschneiden wie auf den Fotos zu sehen ist. Mit schwarzem Garn den schwarzen Teil auf den hellblauen Teil aufnähen. Mit weißem Näh- oder Stickgarn einen kleinen Punkt auf das Schwarze sticken.
Nase
Mit dunkelblau. Langes Fadenende am Anfang stehen lassen.
5 LM, 1 Wendeluftmasche.
KM in nächste LM. HStb in die nächste LM. 2 Stb in nächste LM. HStb in nächste LM. 1 LM, KM in letzte LM. Garn abschneiden und vernähen.
Die Nase zwischen die Augen nähen, dabei zeigt die gewölbte Seite nach unten.
Augen mit hellblauem Nähgarn annähen.
Schritt 9
 Die Ohren an den Kopf nähen Die obere Seite sollte zwischen Runde 11 und 12 enden. Die untere Seite eine Runde über dem Farbwechsel. Dabei darauf achten, dass sie in einer Linie mit den Armen und Beinen sind.
 Das Schwänzchen füllen und mit der unteren Seite zwischen Runde 5 und 6 des Körpers annähen.
Gratuliere! Du hast jetzt einen niedlichen Stitch gehäkelt. Zeige mir deine Kreation und markiere mich in deinem Foto @rxy_crochet!


