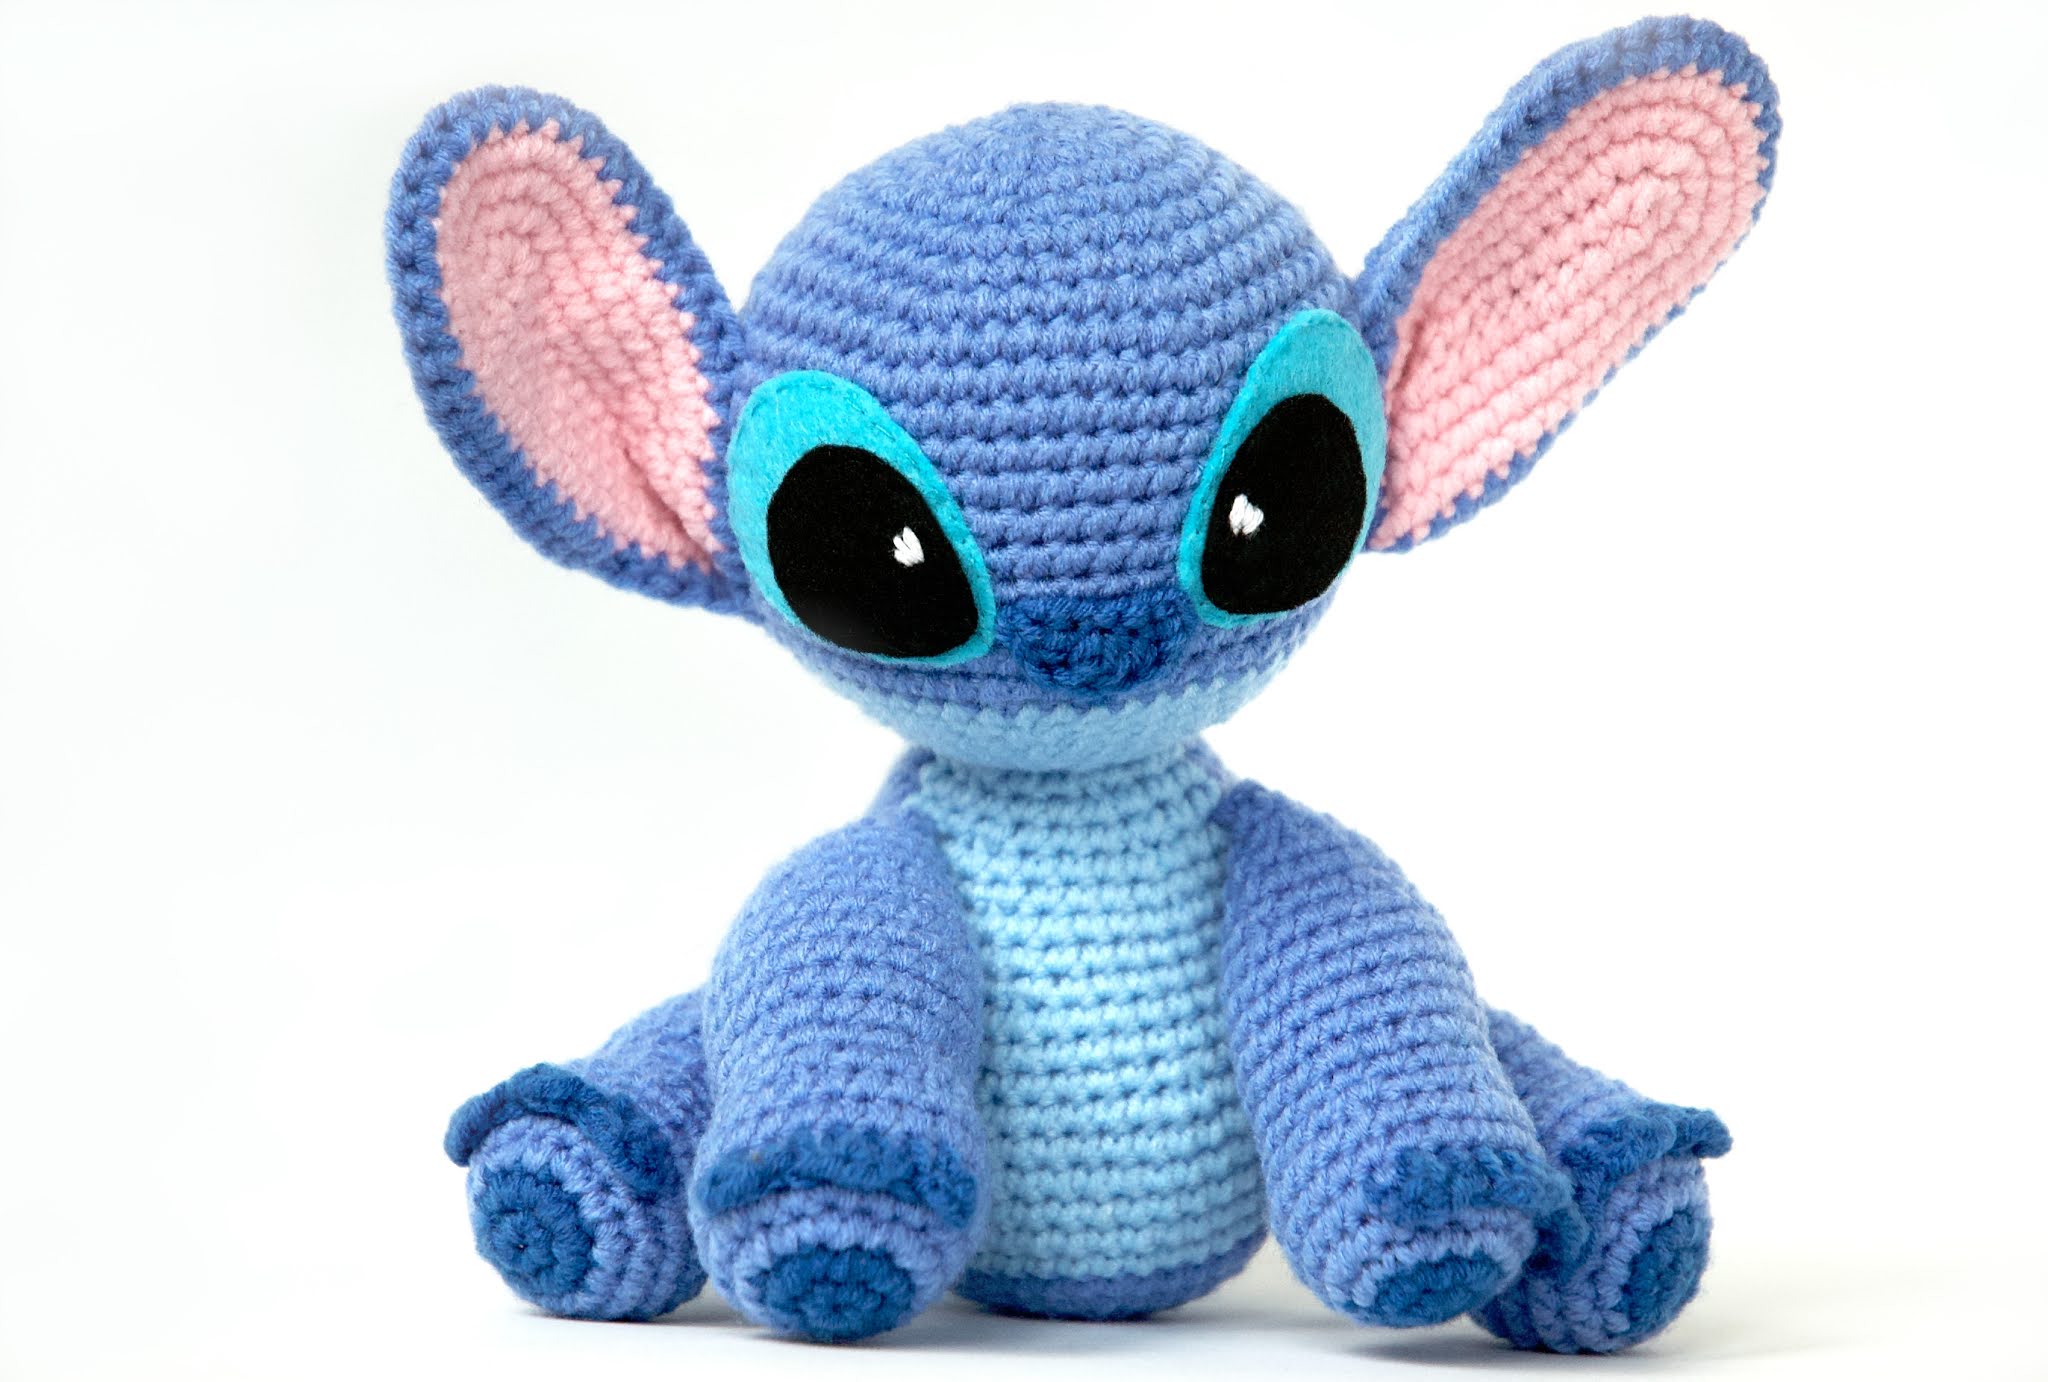
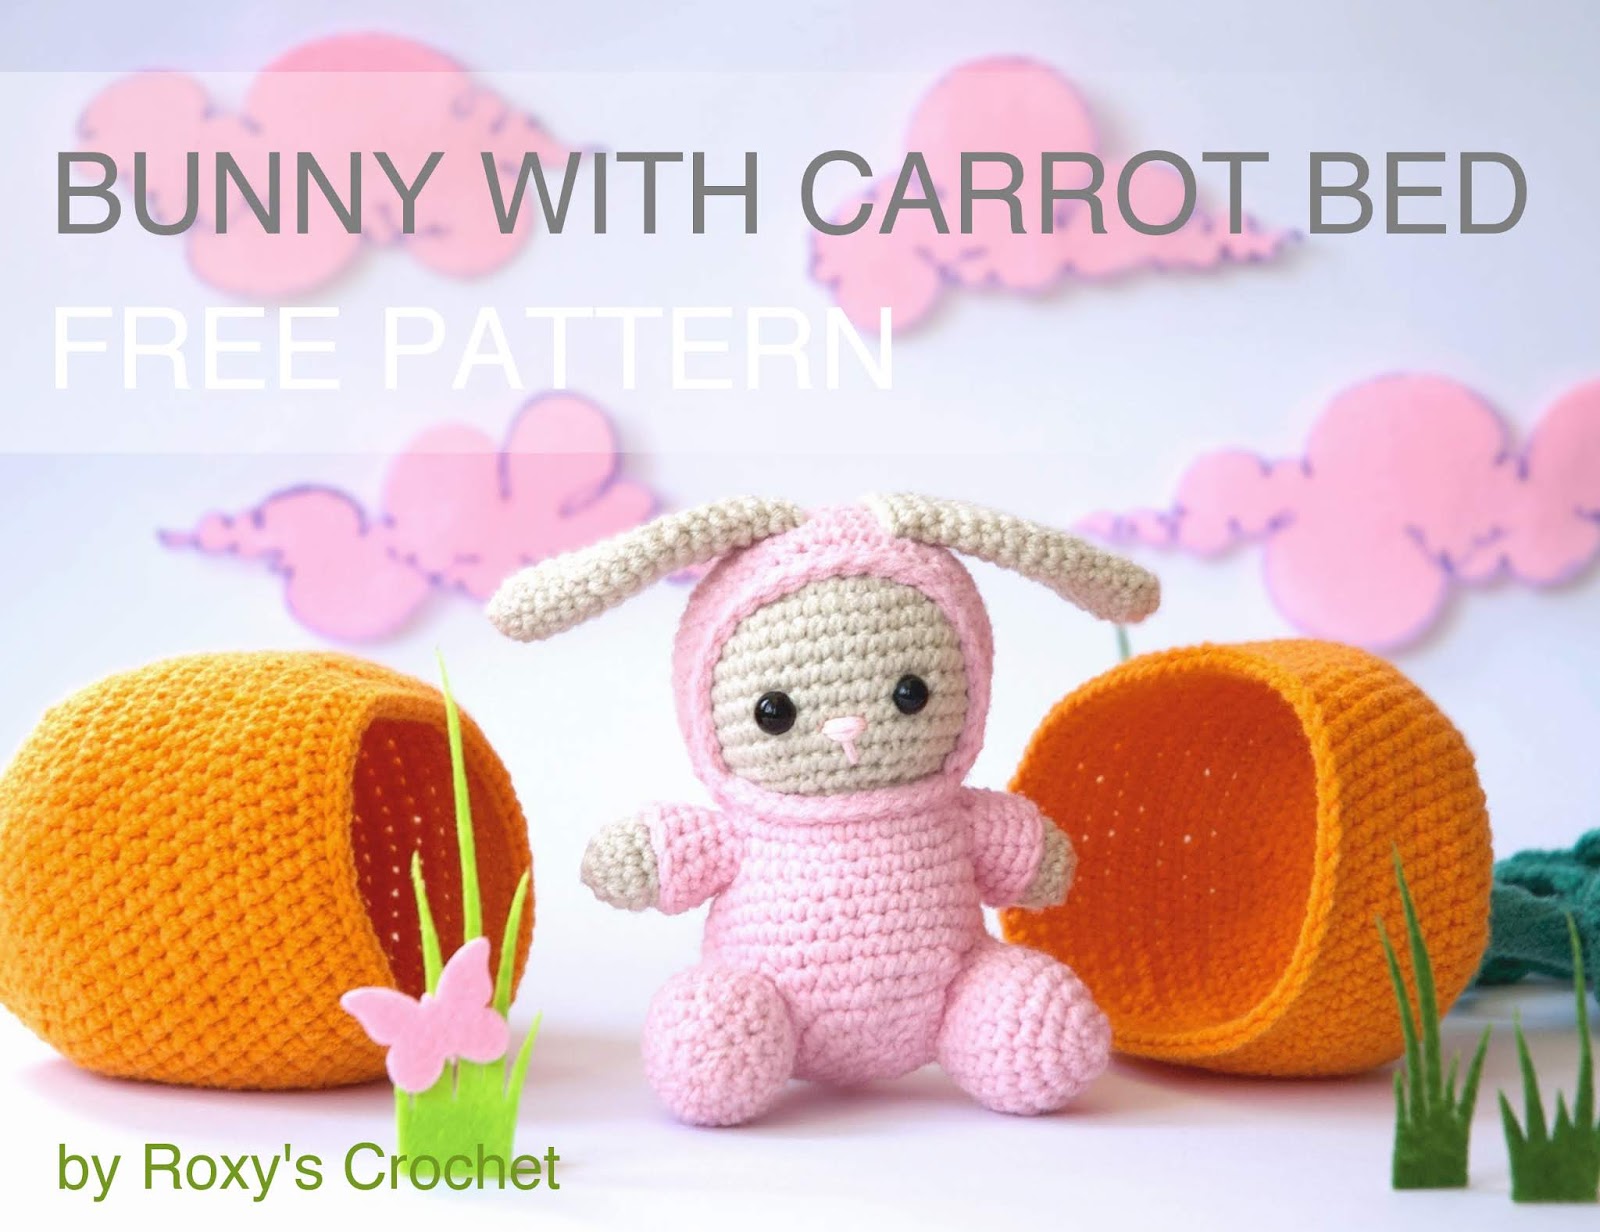
Baby-Bunny with Carrot-Bed

For this project you will need:
Yarn in the colors: Orange, green, beige, rose
Embroidery thread: rose for nose/mouth
Embroidery needle , Yarn Needle -> i recommend get them in several sizes, with a blunt tip (so you don't split the yarn). You will need them very often in amigurumi: the bigger ones for sewing your pieces together and the smaller ones are perfect for embroidery or sewing smaller pieces.
Crochet Hook: 4/2.5 mm -> my go to and absolute favourite crochet hooks are these Japanese Tulip Etimo Rose crochet hooks. I use them all the time!
Scissors or cutter -> if you prefer scissors i can really recommend these beautiful high-quality, vintage scissors
Stitch markers -> i use these
Stuffing -> i use this poly-fil stuffing, i recommend getting a larger amount, because in my experience it's used up fairly quickly


Check out my other patterns on Ravelry

and Etsy:

With beige yarn
R1: 6 sc in magic ring (6)
make sure to place a stitch marker at the end of every round!
make sure to place a stitch marker at the end of every round!
R2: 2 sc in each stitch around (12)
R3: (1 sc, inc) x6 (18)
R4: (2 sc, inc) x6 (24)
R5: (sc in next 3 st, inc) x6 (30)
R6: (sc in next 4 st, inc) x6 (36)
R7: (sc in next 5 st, inc) x6 (42)
R8-15 (8 rounds): sc in each st (42)
R16: (sc in next 5 st, invdec*) x6 (36)
R17: (sc in next 4 st, invdec) x6 (30)
R18: (sc in next 3 st, invdec) x6 (24)
R18: (sc in next 3 st, invdec) x6 (24)
Add safety eyes between row 12 and 13, with about 6 stitches in between.
R19: (sc in next 2 st, invdec) x6 (18)
R20: (sc in next 1 st, invdec) x6 (12)
Stuff head.
R21: invdec around (6)
R21: invdec around (6)
*invisible decrease, see video below:
To close the head, go into outer loops from inside out, pull tight. See video below:
@roxyscrochet Interesting Facts About Crochet Part 1. 🧶 #crochet #amigurumi #interestingfacts #crochettips ♬ original sound - RoxysCrochet
Body
With beige yarn
R1: 6 sc in magic ring (6)
R2: 2 sc in each stitch around (12)
R3: (1 sc, inc) x6 (18)
R4: (2 sc, inc) x6 (24)
R5: (sc in next 3 st, inc) x6 (30)
R6: (sc in next 4 st, inc) x6 (36)
R7-11 (5 rounds): sc in each stitch (36)
R12: (4 sc, invdec) x6 (30)
R13: sc around (30)
R14: (3 sc, invdec) x6 (24)
R15-16: sc around (24)
Stuff body.
Ears (2x)
With beige
R1: 6 sc in magic ring (6)
R2: (1 sc, inc) x3 (9)
R3: sc around (9)
R4: (2 sc, inc) x3 (12)
R5-6: Sc in each st around (12)
R7: (2 sc, inc) x4 (16)
R8-10: sc in each stitch (16)
R11: (2 sc, invdec) x4 (12)
R12-13: sc in each stitch (12)
R14: (1 sc, invdec) x4 (8)
R15-16: sc in each stitch (8)
Tie off, leave a piece of yarn to sew the ears to the hood later.

Legs (2x)
With beige
R1: 6 sc in magic ring (6)
R2: inc in every stitch (12)
R3: (1 sc, inc) x6 (18)
R4: sc around (18)
R5: (2 sc, invdec) x4, 2 sc (14)
R6-7: sc around (14)
R8: (1 sc, invdec) x4, 2 sc (10)
R9: sc around (10)
Tie off, leaving a yarn end for sewing on the body later. Stuff legs.
By the way - check out this super practical yarn bowl!
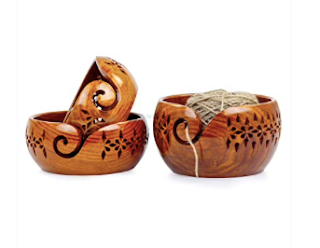
I just got one and it's amazing, it's heavy enough to not move when i pull on the yarn and no more chasing of yarn that's rolling around in my flat.
Arms (x2)
With beige
R1: 6 sc in magic ring (6)
R2: inc in every stitch (12)
R3-4: sc around (12)
R5: 1 sc, invdec (8)
Stuff only thicker part of the arms.
R6-9 (4 rounds): sc around (8)
Stuff only thicker part of the arms.
R6-9 (4 rounds): sc around (8)
Sew the body to the head.
With rose embroidery thread sew nose and mouth between the eyes.Tail
With beige
R1: 6 sc in magic ring (6)
R2: inc in every stitch (12)
R3-4: sc around (12)
R5: (1 sc, invdec) x4 (8)
Cut off yarn, leave an end for sewing to the pajamas at the very end. Stuff tail.
Get the Mix-It Bundle and save 50%!
Hood
With rose yarn
R1: 6 sc in magic ring (6)
R2: 2 sc in each stitch around (12)
R3: (1 sc, inc) x6 (18)
R4: (2 sc, inc) x6 (24)
R5: 1 sc, inc (3 sc, inc) x5, 2 sc (30)
R6: (4 sc, inc) x6 (36)
R7: 2 sc, inc (5 sc, inc) x5, 3 sc (42)
R8-11 (4 rounds): sc around (42)
R12: sc 30, ch 18

Put the hood on the bunny's head.
In the 8. Stitch, counted from beginning of chain, join the chain with a slst, so it goes along the front of the neck.
R13: Sc around the edge along the face and into upper side of the chain. (52)
R14: (4 sc, invdec) x 5, 3 sc (28), slst in next stitch, cut yarn and hide the end.
R15: With the hook go into the lower corner of the opposite side of the hood and pull up loop. (3 sc, invdec) x 6 (24), only along the upper edge of the hood.
R16: Continue to make one round of slst around the complete inner edge of the hood, around the face.
Cut yarn, hide end.
Now sew the arms under the last row of the body, at the neck, directly at the sides of the body, so when you look from above they are on the exact opposite side of each other across the center of the head. Also make the arms flat when sewing them on. They shouldn't be stuffed completely.
Now sew the arms under the last row of the body, at the neck, directly at the sides of the body, so when you look from above they are on the exact opposite side of each other across the center of the head. Also make the arms flat when sewing them on. They shouldn't be stuffed completely.
Turn bunny upside down, with the face pointing away from you. With the hook go into the second loop of the chain, on the (now) left side. Under the shoulder.
Sc around the back of the neck (12) slst in next stitch. Cut yarn and tie off.
The legs also sew on flat, pointing forwards so the bunny can sit. The back side of the legs begins exactly under the middle of the respective arm. About five rows underneath.
You can also make the legs point down, so the bunny is laying flat, but i haven't tried out how that works with the pajamas before.
You can also make the legs point down, so the bunny is laying flat, but i haven't tried out how that works with the pajamas before.
Sew ears to the hood, so they lay flat to the sides.
Now we continue with the pajamas. Please note, that the exact stitch numbers can vary a bit depending on how you sewed your parts together, how you count, how tight your stitches are etc. So if the numbers don't fit exactly for you, feel free to add or delete stitches so the pajamas fit well on your bunny.

Pajamas
With rose
Sleeves
Again holding the bunny upside down.
Go into first unworked ch of hood-chain on the left side (where we started the last round), under the the shoulder.
See photos:


First armhole
Now we crochet along the back:
12 sc, when you arrive at the other back-side of the shoulder, ch 6 for the first armhole.
Slst the armhole-chain into the second chain of the hood-chain, under shoulder. The armhole-chain must go around the arm.
12 sc along the hood-chain until we arrive at the other shoulder.
Second armhole
Ch 6, connect armhole-chain in third sc from beginning of armhole-chain, behind the shoulder. There is one chain and two sc under the shoulder now.
That's how it should look like now:


That's how it should look like now:


10 sc, 6 sc along arm-chain, 12 sc along front of hood. Into next arm-chain 6sc. (34)
Bodypart
Now we sc around the body without any increases or decreases until we arrive at the top of the right leg. 6 rounds sc around (34)
Still holding the bunny upside down:
Left leg
R1: 2 sc, so we arrive at the right leg, chain 10 and connect to the second sc (counting from beginning of chain) with a slst. Make sure the chain is not twisted. Ch 1, Turn.
R2-3: sc around leg (14)
R4: (3 sc, inc) x3, 2 sc (17)
R5: sc around (17)
R6: inc, 16 sc (18)
R7: sc around (18)
R8: (3 sc, invdec) x3, 3 sc (15)
R9: sc around (15)
R10: (2 sc, invdec) x3, 3 sc (12)
R10: (2 sc, invdec) x3, 3 sc (12)
R11: (1sc, invdec) x4 (8), invdec 2 times.
Cut yarn. Go with needle in outer loops, pull tight.
I hope you enjoy this free pattern so far!
To make more free patterns and videos for you in the future
i will need lots of coffee. :D
Would you like to support my work?
You can buy me a symbolic coffee here:


Thank you! This means the world to me! <3
Right leg
R1: With the hook go into the sc directly at the back of the right leg. Chain 10, slst into the second sc from beginning of chain. Ch1, Turn.
R2-3: sc around leg (14)
R4: (3 sc, inc) x3, 2 sc (17)
R5: sc around (17)
R6: inc, 16 sc (18)
R7: sc around (18)
R8: (3 sc, invdec) x3, 3 sc (15)
R9: sc around (15)
R10: (2 sc, invdec) x3, 3 sc (12)
R10: (2 sc, invdec) x3, 3 sc (12)
R11: (1sc, invdec) x4 (8), invdec 2 times.
Cut yarn. Go with needle in outer loops, pull tight.
Still holding the bunny upside down:
Part between legs
R1: go into sc in the front corner of the left leg, sc around (52)
R2: (6 sc, invdec) x6, 4 sc (46)
R3: (5 sc, invdec) x 6, 4 sc (40)
R3: (5 sc, invdec) x 6, 4 sc (40)
R4: (4 sc, invdec) x6, 4 sc (34)
R5: (3 sc, invdec) x6, 4 sc (28)
R6: 8 sc, invdec, 1 sc, invdec, 8 sc, invdec, 1 sc, invdec, 2 sc (24)
R7: (2 sc, invdec) x 6 (18)
R8: (1 sc, invdec) x 4 (12)
R9: invdec x 4 (8)
Cut yarn off. Go into outer loops with a needle, pull tight. Hide end.
R9: invdec x 4 (8)
Cut yarn off. Go into outer loops with a needle, pull tight. Hide end.
Sleeves (2x)
R1-5 (5 rounds): go into any sc on back of shoulder, sc around (11).
Slst, cut yarn, hide end.
If they point to far to the outside, you can sew the inner side of the legs to the lower belly with yarn you used for the pajamas. Put be aware that it might be a little tight to fit the bunny in the carrot if the legs are fixed like this.
If they point to far to the outside, you can sew the inner side of the legs to the lower belly with yarn you used for the pajamas. Put be aware that it might be a little tight to fit the bunny in the carrot if the legs are fixed like this.
Sew the tail to back of pajamas.

Carrot-bed
In orange yarn
R1: 6 sc in magic ring (6)
R2: inc in every stitch (12)
R3: (1 hdc, inc) x 6 (18)
R4: (2 hdc, inc) x 6 (24)
R6: (4 hdc, inc) x 6 (36)
R7: (5 hdc, inc) x 6 (42)
R8: (6 hdc, inc) x 6 (48)
R9: (7 hdc, inc) x 6 (54)
R10: (8 hdc, inc) x 6 (60)
R11-21 (11 rounds): hdc 60
1 sc, slst around, this makes the edge a little bit more stable.
Top of carrot
With orange yarn
R1: 10 hdc in magic ring
R2: inc in every stitch (x10) (20)
R3: 1, inc (x10) (30)
R4: 2, inc (x10) (40)
R5: 3, inc (x10) (50)
R6: 4, inc (x10) (60)
R7: hdc 60 around
R8: 11, inc (x5) (65)
R9-15 (7 rounds): hdc around. Close with a slst. Hide yarn end.
Green part of carrot
Stem
With green yarn
R1: 6 sc in magic ring (6)
R2-13 (12 rounds): sc in every stitch (6)
R14: inc in every stitch (12)
R15-22 (8 rounds): sc in every stich (12)
Cut yarn, leave a yarn end to sew the stem to the top of the carrot. You can stuff the stem, but i didn’t do that.
Leafs (6x)
With new piece of green yarn go into the top of the stem and slst the yarn to it.
chain 23
sc in 2nd ch from hook, 1 sc, 2 hdc , 2 dc, 1 sc,
1 slst
1 sc, 3 dc, 1 hdc, 1 sc, 1 slst
1 sc, 4 dc, 2 sc, 1 slst, 1 slst into stem, ch 1
back side of leaf:
slst in first chain 2 sc, 2 sc, 4 dc, 1 sc, 1 slst
1 sc, 1 hdc, 3 dc, 1 sc, 1 slst
1 sc, 2 dc, 2 hdc, 1 sc, 1 sc, 1 slst
Repeat for other leaves.
When finished, sew green part on top of carrot.
Congrats! You now have created a baby-bunny with his carrot bed!
Show me your creation by tagging me (@rxy_crochet) in your Instagram-photo!
If you find any mistakes in this pattern or have any questions, please feel free to contact me on Instagram (@rxy_crochet) or per mail to rxy_crochet [at] posteo [dot] de
PLEASE ALSO READ BELOW
If you find any mistakes in this pattern or have any questions, please feel free to contact me on Instagram (@rxy_crochet) or per mail to rxy_crochet [at] posteo [dot] de
Check out my other patterns on Ravelry
and Etsy:
This crochet pattern, as well as all images and text contained herein are copyrighted by Roxy's Crochet. Please, don't copy, sell, reproduce, or distribute them in any way to any other person or entity, or post on any website without linking to this blog. You can sell the final product or products created from this crochet pattern in accordance with your state and local laws, with the exception of mass production. Then also i would be happy if you give credit to me as the designer.
Poner la capucha en la cabeza del conejo.
Coser los brazos debajo de la última vuelta del cuerpo, en el cuello, directamente a los lados del cuerpo, de manera que al mirar el conejito de frente los brazos estén exactamente enfrente uno del otro y centrados con la cabeza. Los brazos no se deben rellenar completamente.


Mantener el conejito cabeza abajo:
Conejito con cama zanahoria
Abreviaturas
pto pr | Punto Punto raso/punto enano |
pb | Punto bajo |
aum dis dis. inv. | Aumento Disminución Disminución invisible |
SHT | Sólo hebra trasera |
V (x) | Número de vuelta (x) |
(número) | Número de puntos en la vuelta |
Materiales
Lana de los siguientes colores: naranja, verde, beige y rosa
Grosor de lana: número 3
Hilo de bordar: rosa para la nariz y la boca
Aguja de bordar
Alfileres
Marcador de puntos
Ojos de seguridad: 8-9mm
Aguja de ganchillo: 4 mm y 2.5 mm
Aguja lanera
Tijeras
Relleno
Check out my other patterns on Ravelry
and Etsy:
Cabeza
Con lana beige
V1: Anillo mágico de 6 pb (6)
V2: 1 aum en cada pb (12)
V3: (1 pb, aum) x6 (18)
V4: (2 pb, aum) x6 (24)
V5: (3 pb, aum) x6 (30)
V6: (4 pb, aum) x6 (36)
V7: (5 pb, aum) x6 (42)
V8-15 (8 vueltas): 42 pb (42). Poner los ojos de seguridad entre las V.12 y V13 con 6 puntos de separación
V16: (5 pb, dism. inv.) x6 (36)
V17: (4 pb, dism. inv.) x6 (30)
V18: (3 pb, dism. inv.) x6 (24)
V18: (3 pb, dism. inv.) x6 (24)
V19: (2 pb, dism. inv.)) x6 (18)
V20: (1 pb, dism. inv.) x6 (12). Rellenar la cabeza
V21: 6 dism. inv.(6). Para cerrar la cabeza, coger la hebra delantera de cada pb y tirar fuerte.
V21: 6 dism. inv.(6). Para cerrar la cabeza, coger la hebra delantera de cada pb y tirar fuerte.
Cuerpo
Con lana beige
V1: Anillo mágico de 6 pb (6)
V2: 1 aum en cada pb (12)
V3: (1 pb, aum) x6 (18)
V4: (2 pb, aum) x6 (24)
V5: (3 pb, aum) x6 (30)
V6: (4 pb, aum) x6 (36)
V7-11 (5 vueltas): pb en pb (36)
V12: (4 pb, dism. inv) x6 (30)
V13: pb en pb (30)
V14: (3 pb, dism. inv.) x6 (24)
V15-16: pb en pb (24)
Rellenar el cuerpo
Orejas (x2)
Con lana beige
V1: Anillo mágico de 6 pb (6)
V2: (1 pb, aum) x3 (9)
V3: pb en pb (9)
V4: (2 pb, aum) x3 (12)
V5-6: pb en pb (12)
V7: (2 pb, aum) x4 (16)
V8-10: pb en pb (16)
V11: (2 pb, dism. inv) x4 (12)
V12-13: pb en pb (12)
V14: (1 pb, dism. inv) x4 (8)
V15-16: pb en pb (8)
Cerrar y dejar hebra larga para coser las orejas a la capucha.
Patas (x2)
Con lana beige
V1: Anillo mágico de 6 pb (6)
V2: 1 aum en cada pb (12)
V3: (1 pb, aum) x6 (18)
V4: pb en pb (18)
V5: (2 pb, dism. inv) x4, 2 sc (14)
V6-7: pb en pb (14)
V8: (1 pb, dism. inv) x4, 2 sc (10)
V9: pb en pb (10)
Rellenar las patas. Cerrar y dejar hebra larga para coser al cuerpo
Brazos (x2)
Con lana beige
V1: Anillo mágico de 6 pb (6)
V2: 1 aum en cada pb (12)
V3-4: pb en pb (12)
V5: 1 pb, dism. inv (8)
Rellenar solo la parte más gruesa de los brazos.
V6-9 (4 vueltas): pb en pb (8)
Rellenar solo la parte más gruesa de los brazos.
V6-9 (4 vueltas): pb en pb (8)
Coser el cuerpo a la cabeza
Bordar con hilo rosa la nariz y la boca, entre los ojos.
Cola
Con lana beige
V1: Anillo mágico de 6 pb (6)
V2: 1 aum en cada pb (12)
V3-4: pb en pb (12)
V5: (1 pb, dism. inv) x4 (8)
Rellenar la cola. Cerrar y dejar hebra para coser al pijama.
Capucha
Con lana rosa
V1: Anillo mágico de 6 pb (6)
V2: 1 aum en cada pb (12)
V3: (1 pb, aum) x6 (18)
V4: (2 pb, aum) x6 (24)
V5: 1 pb, aum, (3 pb, aum) x5, 2 pb (30)
V6: (4 pb, aum) x6 (36)
V7: 2 pb, aum, (5 pb, aum) x5, 3 pb (42)
V8-11 (4 vueltas): pb en pb (42)
V12: 30 pb, 18 cad
Poner la capucha en la cabeza del conejo.
En el punto 8, empezando a contar desde el principio de la cadeneta unir con un punto enano de manera que vaya en la parte frontal del cuello
V13: Pb en el borde alrededor de la cabeza y en la parte superior de la cadeneta. (52)
V14: (4 pb, dis. inv) x 5, 3 pb (28), punto enano en el siguiente punto, cerrar.
V15: Con el ganchillo en la esquina inferior del lado contrario de la capucha y enganchar hebra. (3 pb, dism. inv) x 6 (24), solo a lo largo del borde superior de la capucha
V16: Continuar hacienda una ronda de punto enano alrededor del borde interno de la capucha, alrededor de la cara. Cerrar.
Coser los brazos debajo de la última vuelta del cuerpo, en el cuello, directamente a los lados del cuerpo, de manera que al mirar el conejito de frente los brazos estén exactamente enfrente uno del otro y centrados con la cabeza. Los brazos no se deben rellenar completamente.
Girar al conejito de manera que la cara quede mirándote a ti. Con el ganchillo en el segundo punto de la cadena en el lado izquierdo (ahora), debajo del hombro. Pb alrededor de la parte posterior del cuello (12), punto raso en el siguiente punto. Cortar y cerrar el tejido.
Las pieranas también se cosen sin rellenar del todo, apuntando hacia Adelante de manera que el conejito pueda sentarse. La parte de atrás de las piernas empieza exactamente debajo de la mitad del brazo correspondiente, aproximadamente cinco filas debajo. También puedes poner las piernas señalando hacia abajo, de manera q el conejito parezca tumbado, pero no he intentado si esta opción encaja bien con el pijama.
Coser las orejas a la capucha, de manera que queden tumbadas hacia los lados.
Ahora continuaremos con el pijama. El número exacto de puntos puede variar un poco dependiendo de cómo cosieras las diferentes partes, como contaras, como de apretados son tus puntos…De manera que si los números no se ajustan exactamente a lo que tú tienes, siéntete libre de añadir o eliminar puntos para que el pijama encaje perfectamente en tu conejito.
Pijama
Con lana rosa
Mangas
Sujetando el conejito hacia abajo.
Empieza en la primera cadenera libre del lado izquierdo (donde empezamos la última vuelta), debajo de los hombros.
Ver las fotosPrimer hueco del brazo
Ahora cosemos a lo largo de la espalda:
12 pb, cuando llegues a la otra parte de atrás del hombro, 6 cad para el primer hueco.
Punto raso la cadeneta del hueco del brazo en la segunda cadena desde el ganchillo, debajo del hombre. La cadena del hueco del brazo debe ir alrededor del mismo.
12 pb alrededor de la cadena de la capucha hasta llegar al otro hombre.
Segundo hueco del brazo
6 cadenetas, conectar la cadena del hueco del brazo en el tercer pb desde el principio de la cadena, detrás del hombre. Ahora hay una cadena y dos pb debajo del hombro.
Así debe estar ahora el pijama…
Así debe estar ahora el pijama…
10 pb, 6 pb a lo largo de la cadena del brazo, 12 pb a lo largo del frontal de la capucha. 6 pb en la siguiente cadena del brazo. (34)
Parte del cuerpo
Hacer pb alrededor del cuerpo sin oaumentos ni disminuciones hasta llegar a la parte de arriba de la pierna derecha. 6 vueltas de pb alrededor (34)
Mantener el conejito cabeza abajo.
Pierna izquierda
V1: 2 pb, para llegar a la pierna derecho, 10 cad, y conectar con el Segundo pb (contando desde el principio de la cadena)con un punto raso. Asegurar que la cadena no se retuerce. 1 cad., girar.
V2-3: pb alrededor de la pierna (14)
V4: (3 pb, aum) x3, 2 pb (17)
V5: pb en pb (17)
V6: aum, 16 pb (18)
V7: pb en pb (18)
V8: (3 pb, dism. inv) x3, 3 pb (15)
V9: pb alrededor (15)
V10: (2 pb, dism. inv) x3, 3 pb (12)
V10: (2 pb, dism. inv) x3, 3 pb (12)
V11: (1pb, dism. inv) x4 (8), 2 dism. inv
Cortar la lana. Pasar la aguja por la parte exterior de cada punto, apretar y perder la hebra.
Pierna derecha
V1: Con el ganchillo en el pb directamente en la parte posterior de la pierna derecho . 10 cad, pr en el segundo pb desde el principio de la cadena. 1 cad, girar.
V2-3: pb alrededor de la pierna (14)
V4: (3 pb, aum) x3, 2 pb (17)
V5: pb en pb (17)
V6: aum, 16 pb (18)
V7: pb en pb (18)
V8: (3 pb, dism. inv) x3, 3 pb (15)
V9: pb alrededor (15)
V10: (2 pb, dism. inv) x3, 3 pb (12)
V10: (2 pb, dism. inv) x3, 3 pb (12)
V11: (1pb, dism. inv) x4 (8), 2 dism. inv
Cortar la lana. Pasar la aguja por la parte exterior de cada punto, apretar y perder la hebra.
Mantener el conejito cabeza abajo:
Parte entre las piernas
V1: Ir al p ben la esquina de enfrente de la pierna izquierda, pb alrededor (52)
V2: (6 pb, dism. inv) x6, 4 sc (46)
V3: (5 pb, dism. inv) x 6, 4 sc (40)
V3: (5 pb, dism. inv) x 6, 4 sc (40)
V4: (4 pb, dism. inv) x6, 4 sc (34)
V5: (3 pb, dism. inv) x6, 4 sc (28)
V6: 8 pb, dism. inv, 1 pb, dism. inv, 8 pb, dism. inv, 1 pb, dism. inv, 2 pb (24)
V7: (2 pb, dism. inv) x 6 (18)
V8: (1 pb, dism. inv) x 4 (12)
V9: dism. inv x 4 (8)
Cortar la hebra. Cerrar el tejido pasando la aguja por la parte exterior de cada punto. Esconder la hebra.
V9: dism. inv x 4 (8)
Cortar la hebra. Cerrar el tejido pasando la aguja por la parte exterior de cada punto. Esconder la hebra.
Mangas (x2)
V1-5 (5 vueltas): empezar en cualquier punto de laparte posterior del hombre y hacer pb alrededor (11).
Punto raso, cortar y esconder la hebra.
Si apuntan muy hacia afuera, puedes coser la parte interna de las piernas a la parte inferior de la barriga. Ten en cuenta que puede ser un poco difícil encajar al conejito en la zanahoria si las piernas se fijan así.
Si apuntan muy hacia afuera, puedes coser la parte interna de las piernas a la parte inferior de la barriga. Ten en cuenta que puede ser un poco difícil encajar al conejito en la zanahoria si las piernas se fijan así.
Coser la cola a la parte de atrás del pijama.
Cama- zanahoria
Con lana naranja
V1: Anillo mágico de 6 pb (6)
V2: 6 aum (12)
V3: (1 mpa, aum) x 6 (18)
V4: (2 mpa, aum) x 6 (24)
V5: (3 mpa, aum) x 6 (30)
V6: (4 mpa, aum) x 6 (36)
V7: (5 mpa, aum) x 6 (42)
V8: (6 mpa, aum) x 6 (48)
V9: (7 mpa, aum) x 6 (54)
V10: (8 mpa, aum) x 6 (60)
V11-21 (11 rounds): hdc 60
1 pb, punto raso alrededor, lo que hace el borde un poco más estable.
Parte superior de la zanahoria
Con lana naranja
V1: 10 mpa en un anillo mágico
V2: 10 aum (20)
V3: 1 pb, aum (x10) (30)
V4: 2 pb, aum (x10) (40)
V5: 3 pb, aum (x10) (50)
V6: 4 pb, aum (x10) (60)
V7: mpa en cada pb (60)
V8: (11 pb, aum) x5 (65)
V9-15 (7 vueltas): mpa alrededor. Cerrar con un punto raso.
Parte verde de la zanahoria
Tallo
Con lana verde
V1: Anillo mágico de 6 pb (6)
V2-13 (12 vueltas): pb en pb (6)
V14: 6 aum (12)
V15-22 (8 vueltas): pb en pb (12)
Cortar la hebra, dejando un trozo largo para coser el tallo a la parte de arriba de la zanahoria. Puedes rellenar el tallo, aunque yo no lo hice.
Hojas (x6)
Con una hebra nueva de lana verde, ir a la parte superior del tallo y hacer un punto raso para unir.
23 cad.
Pb en el segundo punto desde el ganchillo, 1 pb, 2 mpa , 2 pa, 1 pb,
1 pr
1 pb, 3 pa, 1 mpa, 1 pb, 1 pr
1 pb, 4 pa, 2 pb, 1 pr, 1 pr en el tallo, 1 cad
Parte posterior de la hoja:
Punto raso en la primera cadena, 2 pb, 4 pa, 1 pb, 1 pr
1 pb, 1 mpa, 3 pa, 1 pb, 1 pr
1 pb, 2 pa, 2 mpa, 1 pb, 1 pb, 1 pr
Cortar la hebra
Repetir para las demás hojas
Cuando estén terminadas todas las hojas, coser a la parte superior de la zanahoria.
¡Enhorabuena! ¡Ya has terminado tu conejito con su cama de zanahoria!. Enséñame tus creaciones etiquetándome (@rxy_crochet) en tus fotos de Instagram.
Si encuentras algún error en el patron o tienes alguna duda, siéntete libre de contactar conmigo en Instagram (@rxy_crochet)
Si encuentras algún error en el patron o tienes alguna duda, siéntete libre de contactar conmigo en Instagram (@rxy_crochet)
Check out my other patterns on Ravelry
and Etsy: