Marshmallow the Mini Bear
by @rxy_crochet
english version in US crochet terms
für die DEUTSCHE ANLEITUNG
↓ bitte nach unten scrollen!
english version in US crochet terms
für die DEUTSCHE ANLEITUNG
↓ bitte nach unten scrollen!

If you are new to crocheting and don't want to buy everything separately, i recommend to get a crochet Starter Kit with the main tools.
Yarn in the colors: Pink/Rosé, White -> for example Schachenmayr Bravo
Yarn in the colors: Pink/Rosé, White -> for example Schachenmayr Bravo
Yarn strength: 50 gr/133m, DK light-worsted yarn, number 3
Embroidery thread: black for nose/mouth and eyebrows
Embroidery needle, Yarn Needle -> i recommend get them in several sizes, with a blunt tip (so you don't split the yarn). You will need them very often in amigurumi: the bigger ones for sewing your pieces together and the smaller ones are perfect for embroidery or sewing smaller pieces.
Safety eyes: size 8 -> i recommend to get them in a set with different sizes
Sewing pins -> i recommend getting a bunch of sewing pins, because they tend to get lost or bend a little bit
Hook: size 4/2.5 mm -> my go to and absolute favourite crochet hooks are these Japanese Tulip Etimo Rose crochet hooks. I use them all the time!
Stitch markers -> i use these
Scissors or cutter -> if you prefer scissors i can really recommend these beautiful high-quality, vintage scissors
OR: If you prefer a cutter - like me - i really recommend this quick to grab yarn cutter
Stuffing -> i use this poly-fil stuffing, i recommend getting a larger amount, because in my experience it's used up fairly quickly
By the way - check out this super practical yarn bowl!
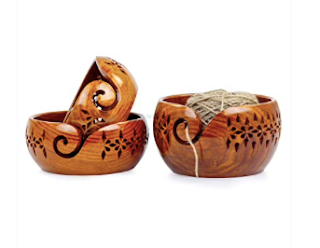
I just got one and it's amazing, it's heavy enough to not move when i pull on the yarn and no more chasing of yarn that's rolling around in my flat.
Subscribe to my Newsletter to get a FREE premium PDF pattern!
Head
With pink yarn
R1: 6 sc in magic ring (6)
R2: 2 sc in each stitch around (12)
R3: (1 sc, inc) x6 (18)
R4: (2 sc, inc) x6 (24)
R5: (sc in next 3 st, inc) x6 (30)
R6-11 (6 rounds): sc in each st (30)
R12: (sc in next 3 st, invdec*) x6 (24)
R13: (sc in next 2 st, invdec) x6 (18)
Add safety eyes size 8 between row 8 and 9, with 4 stitches in between. Stuff the head.
R14: (sc in next st, invdec) x6 (12)
R15: invdec all around (6)
*invisible decrease, see video below:

To close the head go with a sewing needle in the outer loops only (from the inside out) and pull tight. See video below.
Body:
R1: 6 sc in magic ring (6)
R2: 2 sc in each stitch around (12)
R3: (1 sc, inc) x6 (18)
R4-6 (3 rounds): sc in each stitch around (18)
R4-6 (3 rounds): sc in each stitch around (18)
R7: (2sc, invdec) x4, 2 sc (14)
R8: 6 sc, invdec, 4 sc, invdec (12)
Stuff body. Leave a yarn tail and sew body onto head.
Get the Mix-It Bundle and save 50%!


Ears (make 2)
R1: 6 sc in magic ring (6)
R2: 2 sc in each stitch around (12)
R3-4: sc all around (12)
Tie off, leave a piece of yarn to sew the ears to the head later.
Arms (make 2)
R1: 6 sc in magic ring (6)
R2: (1 sc, inc) x3 (9)
R3: sc all around (9)
R4: (1 sc, invdec) x3 (6)
R5-6: sc all around (6)
Tie off, leaving a yarn end for sewing on the body later.
New pattern release/Meine neue Anleitung:
Coco & Chanel the Cats

Legs (make 2)
R1: 6 sc in magic ring (6)
R2: 2 sc in each stitch around (12)
R3-5 (3 rounds): Sc all around (12)
R6: invdec all around (6)
Stuff legs. Tie off, leaving a yarn end for sewing to the body.
Check out my other patterns on Ravelry

and Etsy:

Tail:
R1: 6 sc in magic ring (6)
R2-3: sc all around (6)
R2-3: sc all around (6)
Snout:
With white yarn:
R1: 6 sc in magic ring (6)
R2-3: 2 sc in each stitch around (12)
Now we are going to sew the parts together!
Now we are going to sew the parts together!
Sew head and body together with the mattress-stitch.
Sew on the ears also with the mattress-stitch. The top of them should start between the third and fourth round on the left and right side of the head.
Sew on the ears also with the mattress-stitch. The top of them should start between the third and fourth round on the left and right side of the head.
Then sew on legs and arms.
The back of the legs is sewn on between round 4 and 5 of the body, below the ears and the front part depends on the position you want the legs to be in. You can make the bear sitting or standing. I made something in the middle of both.
The front of the arms begins also below the ears, when looked from the side, and ends a little bit behind them.
Then sew on the tail with the mattress-stitch.
Now sew on the snout, with the upper edge between the rows where the eyes are placed.
Then, with black embroidery-thread, embroider the nose with a few vertical stitches and one horizontal one.
Embroider the brows with one stitch each above the eyes. Position see in the picture below.
For the finish, with white yarn, sew on the fur in the ears and on the belly.

Congrats! You now have created an adorable pink bear!
Show me your creation by linking me (@rxy_crochet) in your Instagram-picture!
Check out my other patterns on Ravelry
and Etsy:
PLEASE ALSO READ BELOW
This crochet pattern, as well as all images and text contained herein are copyrighted by Roxy's Crochet. Please, don't copy, sell, reproduce, or distribute them in any way to any other person or entity, or post on any website without linking to this blog. You can sell the final product or products created from this crochet pattern in accordance with your state and local laws, with the exception of mass production. Then also i would be happy if you give credit to me as the designer.
DEUTSCHE ANLEITUNG
Marshmallow der Mini Bär
von @rxy_crochet

Für dieses Projekt werden benötigt:
Wolle in den Farben: Pink/Rosa, Weiß
Garnstärke: 50 gr/133m
Ich habe Acrylgarn Lisa Premium uni von gründl verwendet.
Stickgarn: Schwarz für Nase/Mund und Augenbrauen
Sticknadel
Sticknadel
Sicherheitsaugen: Größe 8
Häkelnadel: 2,5 mm
Dicke Nadel
Maschenmarkierer
Maschenmarkierer
Schere
Füllung
Füllung
Kopf
Mit rosa Garn
Runde 1:
6 feste Maschen in den Fadenring
(6 Maschen), Ring zuziehen
R2: Jede Masche verdoppeln (12)
R3: Jede zweite Masche verdoppeln (18)
R4: Jede dritte Masche verdoppeln (24)
R5: Jede vierte Masche verdoppeln (30)
R6-11 (6 Runden): In jede Masche eine feste Masche (30)
R12: (3 fM, 1 unsichtbare Abn*) x6 (24)
R13: (2 fM, 1 unsichtbare Abn) x6 (18)
Get the Mix-It Bundle and save 50%!
Nun die Sicherheitsaugen zwischen Reihe 8 und 9, mit einem Abstand von 4 Maschen zueinander anbringen. Dann den Kopf mit Füllwatte füllen.
R14: (1 fM, unsichtbare Abn) x6 (12)
R15: Jede 1. und 2. Masche zusammenhäkeln (6)
Um den Kopf zu schließen mit der Nadel von innen nach außen in die äußeren Maschenglieder gehen. Dann den Faden festziehen.
Siehe Video unten:
*Unsichtbare Abnahme, siehe Video unten:
Körper:
Runde 1:
6 feste Maschen in den Fadenring
(6 Maschen), Ring zuziehen
R2: Jede Masche verdoppeln (12)
R3: Jede zweite Masche verdoppeln (18)
R4-6 (3 Runden In jede Masche eine feste Masche (18)
R7: (2 fM, 1 unsichtbare Abn) x4, 2 sc (14)
R8: 6 fm, unsichtb Abn, 4 fM, unsichtb Abn (12)
Körper füllen, Faden großzügig abschneiden und damit den Körper an den Kopf nähen.
Ohren (2x)
Runde 1:
6 feste Maschen in den Fadenring
(6 Maschen), Ring zuziehen
R2: Jede Masche verdoppeln (12)
R3-4: In jede Masche eine feste Masche (12)
Faden großzügig abschneiden um damit später die Ohren an den Kopf zu nähen.
New pattern release/Meine neue Anleitung:
Coco & Chanel the Cats
Arme (2x)
Runde 1:
6 feste Maschen in den Fadenring
(6 Maschen), Ring zuziehen
R2: (jede zweite Masche verdoppeln) x3 (9)
R3: In jede Masche eine feste Masche (9)
R4: (1 fM, unsichtbare Abnahme) x3 (6)
R5-6: In jede Masche eine feste Masche (6)
Faden großzügig abschneiden zum späteren Annähen.
Beine (2x)
Runde 1:
6 feste Maschen in den Fadenring
(6 Maschen), Ring zuziehen
R2: Jede Masche verdoppeln (12)
R3-5 (3 Runden): In jede Masche eine feste Masche (12)
R6: Jede 1. und 2. Masche zusammenhäkeln (6)
Beine füllen. Faden großzügig abschneiden zum späteren Annähen.
Schwänzchen:
Runde 1:
6 feste Maschen in den Fadenring
(6 Maschen), Ring zuziehen
R2-3: In jede Masche eine feste Masche (6)
Zum schliessen, mit der Nadel in die äußeren Maschenglieder gehen und zusammenziehen. Siehe video oben.
Schnauze:
Mit weißem Garn:
1. Runde:
6 feste Maschen in den Fadenring
(6 Maschen), Ring zuziehen
R2-3: Jede Masche verdoppeln (12)
Faden abschneiden und einen Rest zum Annähen dranlassen.
Jetzt werden wir die Teile zusammennähen.
Die Ohren an den Kopf nähen. Die Oberkante der Ohren sollte zwischen der dritten und vierten Runde, links und rechts des Kopfes beginnen.
Dann Beine und Arme annähen. Die Rückseite der Beine wird zwischen Runde 4 und 5 des Körpers unterhalb der Ohren angenäht, und der vordere Teil hängt von der Position ab, in der sich die Beine befinden sollen. Je nachdem ob der Bär sitzen oder stehen soll. Ich habe ein Mittelding aus beidem gemacht.
Die Vorderseite der Arme beginnt, von der Seite gesehen, unterhalb der Ohren und endet etwas hinter ihnen.
Dann den Schwanz annähen.
Nun die Schnauze, mit der Oberkante zwischen den Reihen in denen die Augen platziert sind, annähen.
Dann mit schwarzem Stickgarn die Nase mit ein paar vertikalen und einem horizontalen Stich annähen.
Die Brauen mit jeweils einem Stich über den Augen aufsticken. Position siehe im Bild unten.
Zum Schluss mit weißem Garn das Fell auf die Ohren und den Bauch sticken.
Glückwunsch! Du hast jetzt einen entzückenden rosa Bären kreiert!
Zeig mir deine Kreation, indem du mich (@rxy_crochet) in deinem Instagram-Bild verlinkst!
Weitere Anleitungen findest du (alle auch auf Deutsch) auf Ravelry
und Etsy:
BITTE BEACHTEN
Dieses Häkelmuster sowie alle hierin enthaltenen Bilder und Texte sind durch Roxy's Crochet urheberrechtlich geschützt. Bitte kopieren, verkaufen, reproduzieren oder verteilen Sie diese in keiner Weise an andere Personen oder Organisationen und veröffentlichen Sie sie nicht auf Websites, ohne auf diesen Blog zu verlinken. Sie können das Endprodukt oder die Produkte, die aus diesem Häkelmuster hergestellt wurden, gemäß Ihren staatlichen und lokalen Gesetzen verkaufen, mit Ausnahme der Massenproduktion. Auch dann würde ich mich freuen, wenn Sie mich als Designer nennen.